A Dutch oven turns a home oven into a professional bread oven. The sealed cast iron traps moisture that the dough releases during the first minutes of baking, creating a miniature steam chamber that no other home method can replicate. That steam is the difference between a pale, soft-crusted loaf and a crackling, glossy, deeply caramelized one.
Professional bakeries use steam-injection ovens that cost thousands of dollars. Home bakers have tried everything — spraying the oven walls, tossing ice cubes onto hot sheet pans, placing cups of water on the oven floor. None of it works as well as a preheated Dutch oven with a lid. This is the method that both Chad Robertson (Tartine Bread) and Ken Forkish (Flour Water Salt Yeast) use at home, and it’s the reason those books revolutionized home bread baking.
If you need a Dutch oven recommendation, see our Dutch oven buying guide. Here, we’re covering the technique.
Why the Dutch Oven Method Works
Three things happen when you put dough into a preheated, lidded Dutch oven:
Phase 1: Condensation
Steam from the dough’s surface condenses on the relatively cool dough, releasing latent heat — roughly 2,260 joules per gram of water vapor. This rapid surface heating keeps the outer dough warm and flexible. The crust doesn’t set yet, which means the loaf can expand freely during oven spring.
Phase 2: Evaporative Cooling
As the dough surface begins to dry, evaporation creates a cooling effect that further delays crust formation. The surface stays extensible for longer, maximizing the expansion window.
Phase 3: Starch Gelatinization
The steam gelatinizes the surface starch, creating a thin, glassy layer. When the lid comes off and the surface dries out, this gelatinized starch hardens into the glossy, crackly crust that defines artisan bread. It’s the same reason professional baguettes have that sheen — the steam does it.
Additionally, steam keeps surface enzymes active longer. More amylase activity means more sugars accumulate on the surface. More protease activity means more amino acids. When the lid comes off and the Maillard reaction kicks in, those accumulated substrates produce a darker, more complex crust than you’d get without steam.
Robertson vs. Forkish: Two Protocols
The two most influential Dutch oven bread books take notably different approaches. Both work. Understanding the differences helps you calibrate your own method.
| Feature | Robertson (Tartine) | Forkish (FWSY) |
|---|---|---|
| Preheat temp | 500 degrees F (260 degrees C) | 475 degrees F (246 degrees C) |
| Preheat time | 20+ minutes | 45 minutes minimum |
| Steam phase (lid on) | 20 minutes at 500 degrees F | 30 minutes at 475 degrees F |
| Dry phase (lid off) | 20-25 minutes at 450-500 degrees F | 15-20 minutes at 475 degrees F |
| Scoring | Yes (single slash) | No (seam-side up, natural splits) |
| Target color | Deep mahogany | Dark brown with spots near-black |
| Total bake time | 40-45 minutes | 45-50 minutes |
Robertson preheats hotter and shorter, bakes the steam phase faster. His method delivers more aggressive initial oven spring due to the higher temperature, but requires confident scoring because the expansion is fierce. The shorter steam phase means the crust sets sooner, which limits spread.
Forkish preheats longer and bakes the steam phase slower. His 45-minute preheat ensures the cast iron is thoroughly saturated with heat — no cold spots. The longer steam phase (30 minutes) gives more time for oven spring and more starch gelatinization on the surface. His loaves tend to have a thicker, more dramatic crust.
The scoring difference is philosophical. Robertson scores every loaf — a single confident slash that controls where the bread opens. Forkish places the dough seam-side up and lets the natural seams rupture during oven spring. “I love the organic look of the natural splits,” Forkish writes. Neither approach is wrong. Try both and see which you prefer.
Choosing a Dutch Oven
A few practical requirements:
Size: 4-quart minimum for a single loaf (about 900g baked). 5-quart gives more room for oven spring without the dough touching the sides. Anything larger works but takes longer to preheat.
Material: Cast iron (bare or enameled) or cast aluminum. Ceramic works but conducts heat more slowly. All must be oven-safe to 500 degrees F with no plastic handles.
Shape: Round for boules, oval for batards. The Lodge Combo Cooker (3.2-quart with a shallow skillet lid) is popular because the shallow side becomes the base — easier to load dough into than a deep pot.
Enameled vs. bare cast iron: Enameled is easier to clean and won’t react with acidic dough. Bare cast iron develops a seasoning layer and handles higher temperatures without risk of enamel damage. Le Creuset recommends a 500 degrees F max for their enameled pieces, which is Robertson’s preheat temperature — tight but within spec.
For specific recommendations with pros and cons, see Best Dutch Ovens for Bread.
The Complete Method
This protocol works with any bread dough — sourdough, overnight yeasted, no-knead. The baking method is independent of the dough method.
Step 1: Preheat
Place the Dutch oven (lid on) in the oven. Set temperature to 475-500 degrees F. Wait at least 30 minutes — 45 is better.
Why so long: Cast iron has enormous thermal mass but conducts heat slowly. A 30-minute preheat at 475 degrees F may leave the interior walls 50-75 degrees F cooler than the air temperature. Forkish’s 45-minute preheat at 475 degrees F ensures the metal itself is at baking temperature, not just the air around it.
Oven accuracy matters. Most home ovens are off by 25-50 degrees F. Use an oven thermometer — not the display — to verify. If your oven runs cool, set it higher. If it runs hot, you’ll burn bottom crusts. See our scale and thermometer guide for recommendations.
Step 2: Prepare the Loaf
While the oven preheats, prepare your proofed dough for loading.
From a banneton: Invert the banneton onto a piece of parchment paper cut to fit inside the Dutch oven. The parchment makes loading easy and prevents sticking.
Direct placement: If your Dutch oven has a shallow base (like the Lodge Combo Cooker), you can invert the banneton directly into the hot pot. This requires confidence and oven mitts.
Step 3: Score
If scoring (Robertson method), do it now, while the dough is still cold from the fridge if you cold-proofed. Cold dough scores cleanly. Warm dough drags.
Hold your razor blade or lame at a 30-degree angle. One smooth, decisive motion — don’t saw. The score should be about 3-4 inches long and half an inch deep.
Common scoring patterns:
- Single slash: The classic. Creates one dramatic ear.
- Cross: Two perpendicular slashes. Opens evenly.
- Square: Four connected slashes forming a box. Opens like a blooming flower.
If using the Forkish method (seam-side up), skip scoring entirely. The seams will rupture on their own.
For scoring technique in depth, see How to Score Bread.
Step 4: Load
Carefully remove the screaming-hot Dutch oven from the oven. Remove the lid. Lower the dough in — either by lifting the parchment paper handles or by inverting from the banneton.
Work quickly. Every second the lid is off, heat escapes. From the moment the oven door opens to the moment the lid goes back on should be 15-30 seconds.
Step 5: Steam Phase (Lid On)
Return the Dutch oven to the oven. Lid on.
Robertson: 20 minutes at 500 degrees F. Forkish: 30 minutes at 475 degrees F. Our recommendation: 25 minutes at 475 degrees F. This splits the difference and works well with most home ovens.
During this phase, the dough’s moisture has nowhere to go. It saturates the small air space inside the Dutch oven, creating the steam environment that drives oven spring and surface gelatinization.
Do not open the lid during this phase. Every time you lift the lid, you release steam that cannot be replaced.
Step 6: Dry Phase (Lid Off)
Remove the lid. Reduce temperature to 450 degrees F if you preheated at 500 degrees F. (If you started at 475 degrees F, keep it there.)
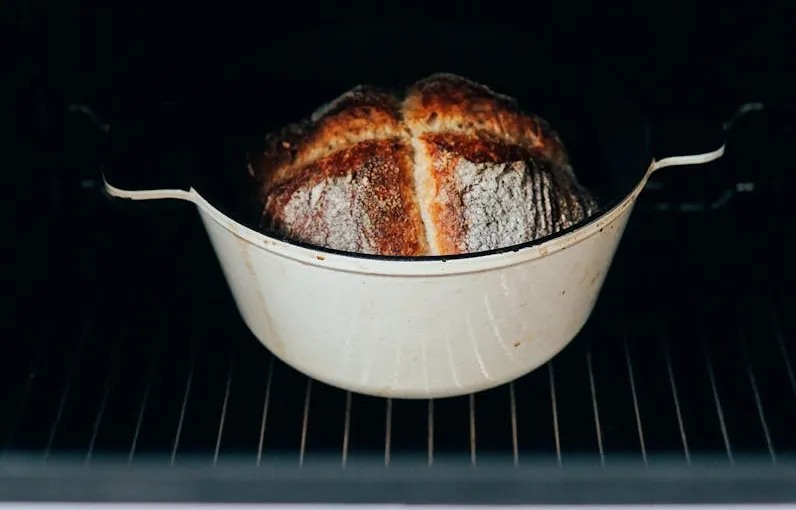
Bake 15-25 more minutes. The crust will go from pale and shiny (gelatinized starch) to golden, then amber, then mahogany. Stop when you see the color described below.
Step 7: Judge the Crust Color
This is where most home bakers go wrong. They pull the bread when it “looks done” — at a light golden brown. Robertson calls this the most common home-baker error: “It is not done. Go darker.”
Target color: deep mahogany to dark amber. Not burnt. Not black. But significantly darker than the color most people instinctively reach for. That color comes from the Maillard reaction (amino acids + sugars = flavor compounds + brown pigments) and caramelization (sugar decomposition). Both contribute flavors that pale crust simply doesn’t have.
Forkish goes further: “I like to bake until there are spots of very dark brown for the full flavors those bits of crust have. At least once, you should try baking a loaf just shy of the point of burning it.”
If you’re nervous about going too dark, split the difference. Pull the loaf when it’s deeper than you’re comfortable with but not as dark as you suspect you should go. Next bake, go a shade darker. You’ll find the sweet spot.
Step 8: Cool
Place on a wire rack. The loaf will crackle and pop as the crust contracts — the bread is “singing,” and it’s a sign of a successful bake.
Cool for at least 45-60 minutes. For sourdough, 2-4 hours is better. The interior crumb continues to set during cooling. Cutting too early compresses the still-gelling starch, producing a gummy texture even with a perfect bake.
Troubleshooting Dutch Oven Bread
Bottom crust burns before the top is done. The Dutch oven is conducting too much direct heat from the oven rack. Solutions: place a baking sheet on the rack below the Dutch oven as a heat shield. Or place the Dutch oven on a baking stone or steel (which distributes heat more evenly). Or reduce the preheat by 25 degrees F.
Loaf sticks to the Dutch oven. Use parchment paper. If you bake without parchment, coat the bottom with semolina or cornmeal — not flour, which burns at these temperatures.
Loaf is flat — no oven spring. Three possible causes: over-proofed dough (the gluten is exhausted), Dutch oven wasn’t hot enough (insufficient initial burst), or the dough wasn’t scored/seams weren’t positioned to allow expansion. Check the dough with the poke test before baking.
Crust is thick and hard. The steam phase was too long or the oven temperature too high during the dry phase. Try removing the lid 5 minutes earlier, or reducing dry-phase temperature by 25 degrees F.
Crust is soft and pale. The steam phase was too short or the preheat was insufficient. Extend the lid-on phase by 5 minutes and ensure a full 45-minute preheat.
The ear tore off. The score was too shallow, or the blade angle was too steep. Score deeper (half an inch) and hold the blade at 30 degrees — nearly parallel to the dough surface.
Bread rose but crust is cracked and ugly. Usually means under-scored. The bread needed a weak point to expand through. Without a score, it found its own — randomly. Score deeper or add more cuts next time. Alternatively, use the Forkish seam-up method for intentionally rustic splits.
Without a Dutch Oven
If you don’t have a Dutch oven, you can still generate steam, but the results won’t be as good.
Best alternative: inverted roasting pan. Place the dough on a preheated baking stone or steel. Cover with an inverted disposable aluminum roasting pan. This creates a similar enclosed steam environment — smaller and less thermally massive, but functional.
Second best: steam pan method. Place a heavy metal pan on the oven floor during preheat. When you load the bread, pour 1 cup of boiling water into the hot pan. The water instantly steams. The downsides: the steam disperses through the whole oven rather than concentrating around the loaf, and it dissipates faster.
Third: spray bottle. Spray the oven walls with water immediately after loading. Repeat after 30 seconds and again after 60 seconds. This creates brief bursts of steam but doesn’t sustain the environment as long. Better than nothing, worse than everything else.
For consistent results, the Dutch oven remains the single best investment for home bread baking. It solves the steam problem completely and requires no improvisation.
The Dark Crust Argument
Robertson and Forkish agree on very little in terms of specific procedure — different temperatures, different timings, different attitudes toward scoring. But they agree completely on one thing: most home bakers don’t bake dark enough.
The Maillard reaction begins around 250 degrees F (120 degrees C) at the crust surface and accelerates dramatically with temperature. Caramelization kicks in around 330 degrees F (165 degrees C). Both produce flavors that are entirely absent in a pale crust. A deeply baked loaf has hundreds of flavor compounds that a lightly baked loaf doesn’t.
The fear of “burning” prevents most people from reaching the dark zone. Here’s the reality: bread internal temperature maxes out at 212 degrees F (100 degrees C) because of the evaporative ceiling — the water inside can’t exceed boiling point. The interior cannot overcook as long as there’s moisture present. Darkening the crust does not dry out the crumb.
The next time you bake, go one shade past your comfort zone. Then taste the crust. You’ll understand why Robertson calls pale bread “not done.”
Challenger Bread Pan — the purpose-built upgrade from a standard Dutch oven. Shallow base for easy loading, heavy lid for steam retention.
Frequently Asked Questions
- Can I use an enameled Dutch oven for bread at 500°F?
- Most enameled Dutch ovens are rated to 500°F (Le Creuset, Staub, Lodge Enameled). However, repeated baking at max temperature will eventually discolor and dull the enamel interior. This is cosmetic, not structural — the pot still works. If you bake bread frequently, a bare cast iron Dutch oven or the Lodge Combo Cooker is more practical. Le Creuset's bread-specific model (the Bread Oven) is designed for this exact use case.
- Do I need to preheat the Dutch oven, or can I put the dough in cold?
- Preheating is essential. A cold Dutch oven doesn't generate steam from the dough's surface fast enough, and the initial temperature burst that drives oven spring is absent. The result is a flatter loaf with a softer, less developed crust. Preheat for at least 30 minutes at 475°F — 45 minutes is better. The cast iron needs time to fully absorb heat through its mass.
- Why does the bottom of my Dutch oven bread always burn?
- Cast iron conducts heat aggressively from the oven rack through the pot's base. Three fixes: place a baking sheet on the rack below the Dutch oven as a heat shield, set the Dutch oven on a baking stone or steel that distributes heat more evenly, or reduce the oven temperature by 25°F. Using parchment paper does not fix bottom burning — it's a heat conduction issue, not a sticking issue.
- Can I bake two loaves in one Dutch oven?
- Only if the Dutch oven is large enough (7-quart+) and you shape one large loaf instead of two separate ones. Two distinct loaves in one pot will fuse together during oven spring. If your recipe yields two loaves, bake them sequentially — reheat the Dutch oven for 10 minutes between bakes. The second loaf can proof at room temperature or stay in the fridge while the first bakes.
- Is a Challenger Bread Pan better than a Dutch oven?
- The Challenger Bread Pan is purpose-built for bread: shallow base for easy loading, heavy lid for steam retention, handles designed for oven mitts. It's genuinely better than a standard Dutch oven for bread baking, especially for batards and longer loaves. The downside is price (about $300) and single-purpose use — a Dutch oven also makes soup. If bread is your primary baking goal and you can justify the cost, the Challenger is a real upgrade. If you bake occasionally, any 5-quart Dutch oven does the job.