Proofing is the stage where most home bread goes wrong. Under-proof by 30 minutes and you get a dense, tight loaf. Over-proof by 30 minutes and you get a flat, collapsed one. The window between the two can be narrow — especially with commercial yeast, where Forkish notes the proofing window can be as tight as 10-15 minutes for straight doughs.
The good news: both under-proofed and over-proofed bread leave clear evidence. The crumb structure, the loaf shape, the crust behavior, and the oven spring all tell you exactly what happened. Once you can read those signals, you can adjust your next bake with precision.
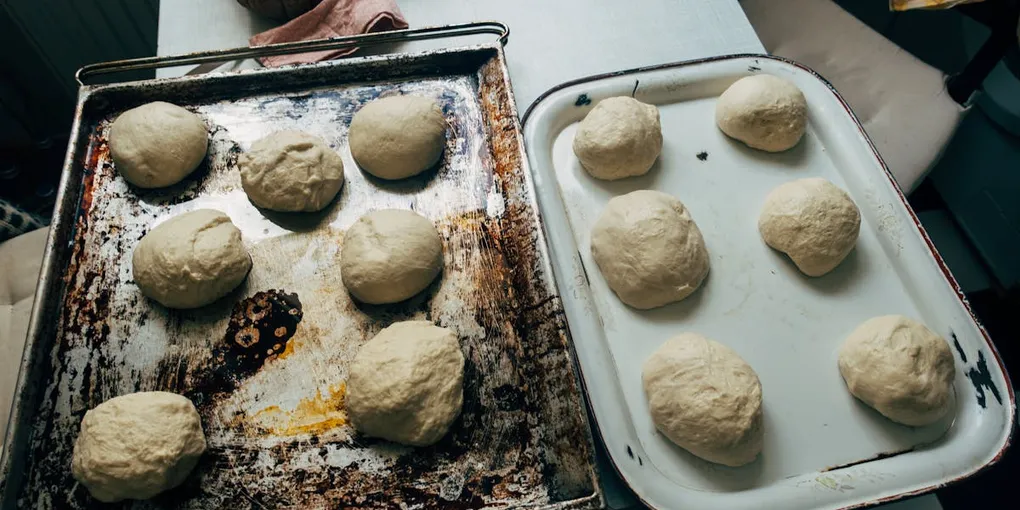
The Poke Test: Your Best Real-Time Tool
Before we get into post-bake diagnostics, the poke test is how you avoid proofing problems in the first place. All five major bread authors agree on this method.
Press a floured finger gently into the dough surface, about half an inch deep. Then watch what happens:
| Dough Response | Meaning | Action |
|---|---|---|
| Springs back immediately and completely | Under-proofed | Wait 15-30 more minutes |
| Springs back slowly and partially, leaving a slight indent | Correctly proofed | Bake now |
| Does not spring back at all — indent stays | Over-proofed | Bake immediately; expect compromised oven spring |
The poke test works because it measures gluten tension. Under-proofed dough has tight, elastic gluten — it snaps back. Correctly proofed dough has relaxed gluten with gas pressure balancing the tension — it recovers slowly. Over-proofed dough has exhausted, overstretched gluten — it has no elastic recovery left.
Important: Flour your finger. Wet or bare fingers stick to the dough and tear the surface instead of making a clean impression.
Temperature affects the test. Cold-retarded dough (from the fridge) will feel firmer and spring back more than room-temperature dough at the same proofing stage. Account for this — a cold-proofed loaf that springs back firmly may still be properly proofed. When in doubt with cold dough, score deeply and bake. The oven spring will tell you the truth.
For a dedicated deep dive, see our poke test proofing guide.
Under-Proofed Bread: What It Looks Like
Under-proofing means the dough didn’t ferment long enough before baking. The yeast hadn’t produced enough CO2, the gluten hadn’t relaxed enough, and the crumb structure wasn’t fully developed.
Crumb Signs
Dense, tight, uniform small holes. This is the classic under-proofed crumb — tiny, evenly distributed bubbles with no variation in size. The gas cells never had enough CO2 to inflate into the open, irregular structure that characterizes well-fermented bread.
Dense center, open edges. Sometimes the edges of the loaf proof adequately (they’re exposed to warmth) while the center stays under-proofed (insulated by the surrounding dough mass). This creates a gradient — more open near the crust, tighter in the middle.
External Signs
Excessive oven spring with side blowouts. Under-proofed dough still has enormous energy. When it hits the oven, the remaining yeast goes into overdrive, and the tight gluten has room to expand explosively. If the score isn’t deep enough to release this energy, the bread rips along the sides or bottom where the crust is weakest.
Scoring cuts that open dramatically wide. The score on an under-proofed loaf often gapes open into a deep canyon because the dough has so much expansion energy. This can look impressive but indicates the interior isn’t as open as it should be.
Thick, tough crust. The extended oven spring means the loaf spends longer expanding, which keeps the interior cooler longer. The crust develops while the interior is still catching up, often producing a thicker, harder crust than optimal.
How It Tastes
Under-proofed bread tastes “bready” — heavy, wheaty, one-dimensional. The flavor compounds from extended fermentation (organic acids, esters, Maillard substrates) haven’t developed fully. It’s not bad bread — it’s just unremarkable bread.
Over-Proofed Bread: What It Looks Like
Over-proofing means the dough fermented too long. The yeast exhausted its food supply, the gluten stretched to its maximum, and the structure began to collapse.
Crumb Signs
Huge tunnels near the top, dense bottom. This is Robertson’s diagnostic signature for over-proofed bread. As the dough over-proofs, the last burst of gas rises to the top of the loaf. The top develops large, irregular cavities while the bottom, where the gas has escaped, compresses into a dense layer.
Collapsed structure with irregular voids. Over-proofed dough doesn’t hold a uniform crumb because the gluten network is breaking down. You see random patches of open and tight crumb, sometimes with elongated tunnels that follow the path of escaping gas.
External Signs
Flat loaf with minimal oven spring. The gluten is exhausted. When the bread enters the oven, there’s no remaining elastic tension to push the loaf upward. The expansion that does occur is lateral — the loaf spreads out instead of springing up.
Score marks that barely open. An over-proofed loaf doesn’t have the internal pressure to push the score apart. The cuts may look like shallow lines on the surface rather than opened ears.
Concave or sunken top. In severe over-proofing, the top of the loaf actually sinks inward during or after baking as the structure collapses under its own weight.
Fragile, thin crust. Without oven spring to stretch the surface, the crust doesn’t develop thickness. It may be pale and soft rather than thick and crisp.
How It Tastes
Over-proofed bread can taste sour, yeasty, or both. The extended fermentation produces excess organic acids (especially in sourdough) and alcohol. The flavor isn’t complex — it’s just acidic.
Side-by-Side Comparison
| Feature | Under-Proofed | Correctly Proofed | Over-Proofed |
|---|---|---|---|
| Crumb | Dense, tight, uniform tiny holes | Open, irregular mix of small and medium holes | Tunnels at top, dense at bottom |
| Oven spring | Explosive, often with side blowouts | Strong, controlled, fills the score | Minimal or none |
| Score behavior | Gapes wide open | Opens cleanly with an ear | Barely opens |
| Loaf shape | Tall, sometimes burst | Round/oval with good height | Flat, wide, possibly sunken |
| Crust | Thick, sometimes tough | Thin, crisp, deep color | Thin, pale, soft |
| Poke test | Snaps back immediately | Slow partial springback | No springback |
| Flavor | One-dimensional, bready | Complex, balanced | Sour, yeasty, acidic |
Volume Indicators: When Is Bulk Done?
The poke test works for final proofing (after shaping). But how do you judge bulk fermentation — the long first rise before shaping?
The authors disagree on target volumes, and the disagreement is meaningful:
| Author | Recipe | Target Volume Increase | Context |
|---|---|---|---|
| Robertson | Country Bread (sourdough) | 20-30% | Short warm bulk (3-4 hrs at 78-82°F) |
| Forkish | Saturday White (yeasted) | Triple (3x) | Medium bulk (~5 hrs at 77-78°F) |
| Forkish | Overnight White (yeasted) | 2.5-3x | Long overnight bulk (12-14 hrs) |
| Hamelman | Standard lean bread | Time-based: 1.5-2 hrs | Professional context with precise temp control |
The discrepancy is not a contradiction. Robertson’s sourdough uses wild yeast in a short, warm bulk — the dough finishes most of its rising during the final proof. Forkish’s yeasted breads use commercial yeast in a longer bulk — most of the rising happens before shaping.
The practical lesson: Know which type of recipe you’re following and use the appropriate volume target. Using Robertson’s 20-30% target for a Forkish yeasted bread would result in a massively under-proofed loaf. Using Forkish’s triple target for a Robertson sourdough would result in a puddle.
Other Bulk Indicators
Volume isn’t the only signal. Also look for:
- Bubbles on the surface. A few scattered bubbles mean fermentation has started. A surface covered in small bubbles means it’s well underway.
- Bubbles around the edges. Look at the side of a clear container — gas pockets along the walls indicate active fermentation throughout the dough.
- Jiggle. Gently shake the container. Well-fermented dough jiggles like a water balloon. Under-fermented dough moves like a solid mass.
- Pulling away from the sides. As gas inflates the dough, it sometimes releases from the container walls.
Cold Retarding: The Proofing Safety Net
Cold retarding — refrigerating shaped dough overnight — is the single best technique for avoiding proofing disasters.
At 37-40°F (3-5°C), fermentation slows nearly to zero. Yeast becomes mostly dormant. Acetic acid bacteria remain slightly active (contributing flavor), but the rise effectively pauses. This turns a 10-minute proofing window into a 12-36 hour proofing window.
Additional benefits:
- Extends flavor development time
- Firms the dough for easier, cleaner scoring
- Provides scheduling flexibility — bake when you’re ready, not when the dough demands it
- Cold dough bakes with more dramatic oven spring (the temperature differential between cold dough and hot oven drives expansion)
Robertson uses cold retarding as his primary proofing method: shape, put in banneton, refrigerate overnight, bake straight from cold.
Forkish confirms: “The chilled loaves don’t need to be warmed to room temperature before baking.”
The only risk with cold retarding is going too long. Beyond 36-48 hours, protease activity (which doesn’t stop completely at fridge temps) can degrade gluten. The dough becomes slack and over-acidic. For most recipes, 12-18 hours is the sweet spot.
How to Fix Under-Proofed Bread (Next Time)
- Check dough temperature. Target 75-78°F (24-26°C) after mixing. Use a probe thermometer. If your dough is cooler, use warmer water next time.
- Verify yeast/starter activity. Test commercial yeast in warm water + sugar. Float-test your sourdough leaven.
- Extend bulk fermentation. If you’ve been using time as your guide, switch to volume. Use a clear container and mark the starting level.
- Extend proofing. After shaping, wait longer before baking. Check with the poke test every 15 minutes once you think it’s close.
- Score deeper. If you can’t extend the proof, score the loaf deeply — half an inch — to give the under-proofed dough room to expand without blowing out the sides.
How to Fix Over-Proofed Bread (Next Time)
- Shorten bulk fermentation. Check the dough 30-60 minutes earlier than your last bake.
- Shorten proofing. Shape and get into the oven faster, or cold-retard immediately after shaping.
- Reduce yeast. If you’re over-proofing consistently, your kitchen may be warmer than you think. Reduce yeast by 10-20%, or use cooler water.
- Use the poke test earlier and more frequently. Begin poke-testing 30 minutes before your expected proof time.
- Cold retard as insurance. If you’re unsure whether the dough is fully proofed, put it in the fridge. You can always bake later. You can’t un-proof an over-proofed loaf.
When in Doubt
If you can’t tell whether the dough is ready, lean slightly toward under-proofed. Under-proofed bread has better oven spring, better structure, and better texture than over-proofed bread. It may be a bit dense, but it’s still good bread. Over-proofed bread often can’t be rescued.
Score deep, bake hot, and make a note for next time. That’s how every baker improves — one loaf at a time.
For specific dense-bread causes beyond proofing, see Why Is My Bread Dense?. For the full troubleshooting reference, see our bread troubleshooting guide.
Frequently Asked Questions
- How do I know if my bread is overproofed or underproofed?
- Cut the loaf and look at the crumb. Dense, tight, uniform small holes means underproofed. Large tunnels at the top with a dense bottom means overproofed. Use the poke test before baking: slow partial springback means correctly proofed.
- Can you fix overproofed dough?
- Partially. If the dough is only slightly overproofed, you can gently reshape it and give it a short second proof. If it's severely overproofed (slack, no structure, very acidic smell), the gluten is too degraded to recover. Bake it as-is and expect a flat loaf.
- Is it better to underpoof or overproof bread?
- Slightly underproofed is always better. Underproofed bread has good oven spring, reasonable structure, and acceptable texture — it's just a bit dense. Overproofed bread is flat, sour, and has compromised crumb structure that can't be fixed.
- How long should I proof sourdough bread?
- It depends on temperature and starter activity. At 75°F, final proofing typically takes 2-4 hours. Cold retarding in the fridge takes 12-18 hours. Use the poke test rather than time to judge readiness.
- Why does my bread have big holes on top and dense bottom?
- This is the classic sign of overproofing. Gas migrated upward as the gluten network weakened, creating tunnels at the top while the bottom compressed. Shorten your proof time or cold-retard immediately after shaping.