Every baker remembers their first loaf. For most, it was either a triumph that hooked them for life or a dense, pale disappointment that made them wonder what went wrong. The difference almost always comes down to which recipe they started with.
The recipes below are ranked from easiest to hardest. Each one builds on the skills from the one before, so by the time you reach number five, you have practiced every fundamental technique in bread baking: measuring, mixing, folding, shaping, scoring, and working with sourdough.
Start at number one. Do not skip ahead.
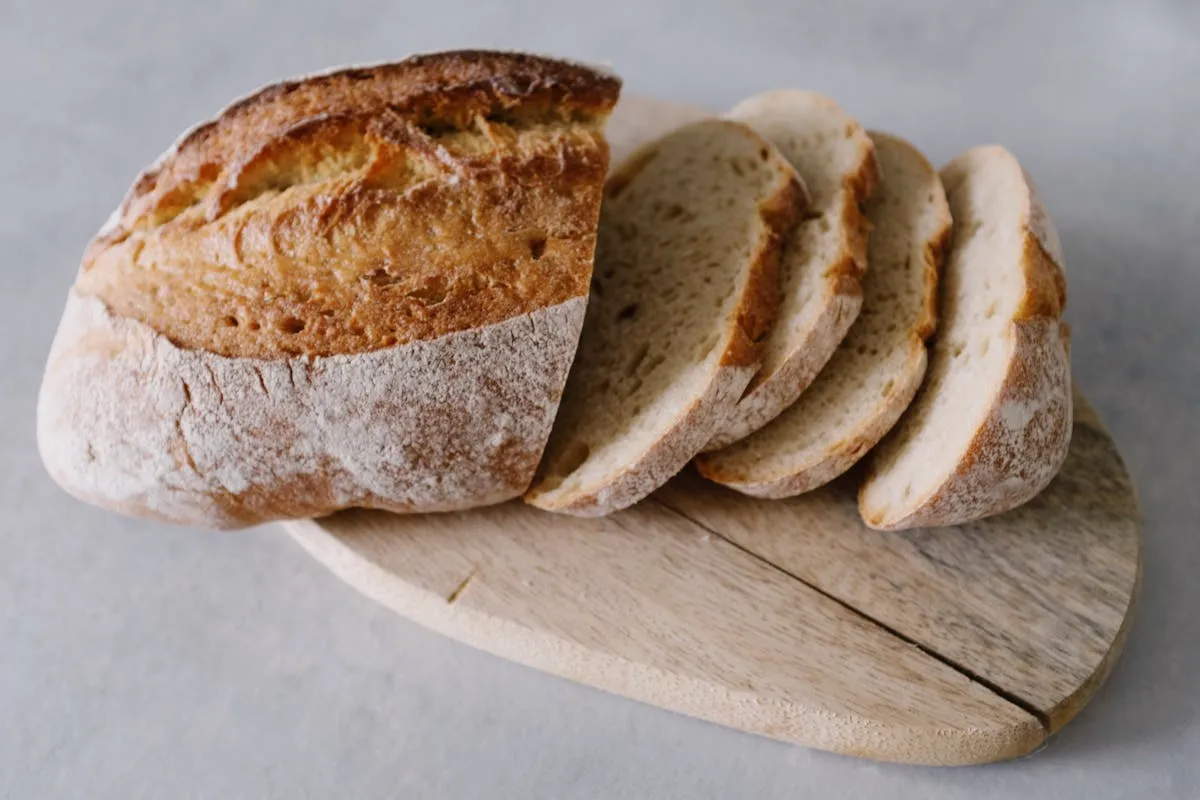
1. Forkish’s Saturday White Bread — The Absolute Easiest
Ken Forkish designed this recipe as the entry point to bread baking, and it delivers. Four ingredients, one morning, no fancy technique, spectacular bread by dinner.
Why it is number one: No preferment. No sourdough starter. No overnight wait. You mix the dough at 9:30 AM and bake at 4:15 PM. The recipe uses commercial instant yeast, which is predictable and forgiving. The hydration is moderate (72%), so the dough is workable without being impossibly sticky.
Formula (baker’s percentages):
| Ingredient | Baker’s % | Weight |
|---|---|---|
| White bread flour | 100% | 1,000g |
| Water | 72% | 720g |
| Salt | 2.1% | 21g |
| Instant yeast | 0.4% | 4g |
What you will learn:
- Weighing ingredients with a scale (why scales matter)
- The pincer mixing method — squeezing through the dough with your thumb and forefinger
- Stretch-and-fold technique during bulk fermentation
- Judging fermentation by volume (target: tripled in about 5 hours at 77-78 degrees Fahrenheit)
- Baking in a Dutch oven — Forkish’s method: 475 degrees Fahrenheit, lid on 30 minutes, lid off 15-20 minutes
Key detail: Forkish does not score his bread. He places the dough seam-side up and lets the natural seam split during oven spring. This removes one variable for beginners to worry about.
Expect: A beautifully rustic loaf with a dark, crackly crust and an open, irregular crumb. The flavor comes from the 5-hour fermentation at warm temperature — not complex, but genuinely good.
2. Forkish’s Overnight White Bread — Adding Time
This is the Saturday White with one change: less yeast and an overnight bulk fermentation. That single change produces dramatically better flavor.
Why it is number two: Same skill set as the Saturday White, but you mix the dough at 7:00 PM, let it ferment overnight (12-14 hours), and bake the next morning. The only new variable is patience.
Formula (baker’s percentages):
| Ingredient | Baker’s % | Weight |
|---|---|---|
| White bread flour | 100% | 1,000g |
| Water | 78% | 780g |
| Salt | 2.2% | 22g |
| Instant yeast | 0.08% | 0.8g |
What you will learn:
- How dramatically reducing yeast (from 0.4% to 0.08%) extends fermentation
- Forkish’s “less yeast, more flavor” principle: tiny amounts of yeast with long fermentation produce extraordinary complexity
- Working with higher hydration (78% vs. 72%) — the dough is slacker and stickier
- Judging overnight fermentation: target 2.5-3 times original volume by morning
Key detail: The yeast quantity is just 0.8g per 1,000g of flour. This is barely a quarter teaspoon. Accuracy matters — if you accidentally double or triple this tiny amount, the dough will over-ferment overnight. A kitchen scale accurate to 0.1g is essential for this recipe.
Expect: Deeper, sweeter, more complex flavor than the Saturday White. The long, slow fermentation develops esters and alcohols that a 5-hour bulk cannot match. The crust is darker and more complex. This bread is genuinely great.
3. Hamelman’s No-Knead Method — Folding Instead of Kneading
Jeffrey Hamelman’s unkneaded six-fold method proves that gentle folding can replace mechanical mixing entirely. The dough is mixed shaggy, then receives 6 folds at 10-minute intervals. No stand mixer. No kneading.
Why it is number three: It introduces the concept that gluten develops through time and gentle manipulation, not just aggressive force. This is the foundational insight for all advanced bread making — and especially for sourdough, where minimal mixing preserves flavor compounds.
Formula (baker’s percentages):
| Ingredient | Baker’s % | Weight |
|---|---|---|
| Bread flour | 100% | 500g |
| Water | 70% | 350g |
| Salt | 2% | 10g |
| Instant yeast | 0.5% | 2.5g |
What you will learn:
- Mixing just to combine (no development at all)
- Six folds at 10-minute intervals — stretch one side up and fold over, rotate, repeat all four sides
- Watching gluten develop through folding alone — the dough transforms from shaggy to smooth over 6 folds
- Autolyse technique: mix flour and water first, rest 20-30 minutes, then add salt and yeast
Expect: A well-structured loaf that demonstrates folding power. The crumb will be moderately open. This method works for almost any bread formula — once you understand folding, you can apply it everywhere.
4. A Shaped Artisan Loaf — Boule with Scoring
Now you put it all together: pre-shaping, bench rest, final shaping, proofing in a banneton, scoring, and baking. This is where bread becomes craft.
Use any of the dough formulas above (the Overnight White at 78% hydration is ideal). The difference is in what you do after bulk fermentation.
Why it is number four: Shaping and scoring require new physical skills. Building surface tension in a boule, getting a clean score with a lame, and managing a proofing basket are all hands-on techniques that only improve with practice.
What you will learn:
- Pre-shaping: Gently round the dough into a ball on an unfloured surface, building initial surface tension
- Bench rest: Cover and wait 20-30 minutes for the gluten to relax
- Final shaping: Fold the edges toward center, flip seam-down, rotate on the counter to tighten the skin
- Proofing: Transfer seam-up into a floured banneton (rice flour + wheat flour blend prevents sticking)
- The poke test: Press a floured finger into the dough — it should spring back slowly, leaving a slight indent
- Scoring: Use a lame or sharp razor blade. Hold at 30 degrees for an ear-style cut, or perpendicular for a simple cross
- Robertson’s philosophy: Shape on an unfloured surface — the stickiness provides traction for building tension
Expect: Your first scored loaf will not be perfect. The score may not bloom evenly, the shape may be lopsided, the surface tension may be uneven. This is normal. Shaping is a physical skill that improves with every loaf. By your fifth attempt, you will see dramatic improvement.
5. Your First Sourdough — Beginner Country Loaf
This is the milestone: bread leavened entirely by wild yeast and bacteria from a sourdough starter you built yourself. No commercial yeast.
Why it is number five: Sourdough adds variables that commercial yeast avoids: leaven timing, float test judgment, fermentation rate uncertainty, and flavor management. Every skill from recipes 1-4 applies here, plus new ones.
Formula (baker’s percentages):
| Ingredient | Baker’s % | Weight |
|---|---|---|
| Bread flour (white) | 90% | 450g |
| Whole wheat flour | 10% | 50g |
| Water | 75% | 375g |
| Salt | 2% | 10g |
| Leaven | 20% of flour | 100g |
Prerequisites: You need an active sourdough starter that reliably doubles in 6-8 hours after feeding. Building one from scratch takes 5-7 days. See our starter guide.
The leaven build: The night before baking, take 1 tablespoon of mature starter and mix with 50g bread flour + 50g whole wheat flour + 100g water. Leave in a warm spot (75-80 degrees Fahrenheit) overnight. In the morning, check with the float test — a spoonful dropped in water should float.
The process:
- Autolyse: Mix flours and most of the water. Rest 30-40 minutes.
- Add leaven and salt. Dissolve salt in reserved water, combine with leaven and autolysed dough. Pincer mix 3-5 minutes.
- Bulk fermentation: 3-4 hours at 78-82 degrees Fahrenheit. Fold every 30 minutes for the first 2 hours, then leave undisturbed. Target 20-30% volume increase.
- Pre-shape, bench rest, final shape — exactly as practiced in recipe 4.
- Proof: Either 3-4 hours at room temperature or overnight in the refrigerator (the cold retard option gives you scheduling flexibility and makes scoring easier).
- Bake: In a Dutch oven — 500 degrees Fahrenheit lid on for 20 minutes, then 450 degrees Fahrenheit lid off for 20-25 minutes. Go dark. Robertson: “It is not done. Go darker.”
What you will learn:
- Building and using a leaven
- The float test — your go/no-go signal
- Sourdough fermentation timing — slower and less predictable than commercial yeast
- The relationship between temperature and fermentation speed
- Cold retarding as a scheduling tool
Expect: Your first sourdough will likely be denser than your Dutch-oven yeasted loaves. The crumb may be tighter, the rise shorter, the flavor different. This is normal. Sourdough is a different beast, and it takes 3-5 loaves to calibrate your timing, temperature, and leaven management. Each loaf teaches you something the recipe cannot.
The Progression: What You Are Building
| Recipe | Key Skill Added | Difficulty |
|---|---|---|
| 1. Saturday White | Mixing, folding, Dutch oven baking | Beginner |
| 2. Overnight White | Long fermentation, low yeast, timing | Beginner+ |
| 3. No-Knead Six-Fold | Folding as gluten development, autolyse | Intermediate |
| 4. Shaped Boule | Pre-shape, final shape, scoring, proofing | Intermediate+ |
| 5. Sourdough Country | Leaven building, float test, wild fermentation | Advanced beginner |
Equipment You Need
You do not need much. The essentials, in order of importance:
- Kitchen scale — weight measurements are non-negotiable. All five major bread authors insist on this. If you buy nothing else, buy a scale.
- Dutch oven (4 quart or larger) — your home steam injection system. This single piece of equipment is responsible for more successful home bread than any other.
- Probe thermometer — for water temperature and checking internal doneness. Forkish calls it non-negotiable.
- Bench scraper — for dividing, moving, and shaping dough.
- Clear container (Forkish recommends a 12-quart Cambro) — for tracking volume during bulk fermentation.
Everything else — bannetons, lames, baking stones — can wait until you are ready for recipes 4 and 5.
For a deeper dive into what you need and what you can skip, see our complete bread baking equipment guide.
Common Beginner Mistakes
Measuring flour by volume. Cups are wildly inconsistent. One cup of scooped flour can weigh 120g or 160g depending on packing. Use a scale.
Not trusting the process. Bread dough looks shaggy and unpromising for the first hour. It gets sticky, it sticks to your hands, it seems wrong. Keep going. By the third fold, it will come together.
Pulling the bread too early. The loaf looks golden at 15 minutes. It is not done. Most home bakers under-bake. Go darker than your instinct says. The Maillard reaction that creates complex crust flavor happens at the dark end of the spectrum.
Slicing too soon. The crumb continues setting as the bread cools. Wait at least 20 minutes (Forkish) to 2 hours (Robertson) before cutting.
Adding too much flour during shaping. Excess flour on the dough surface creates dry patches that do not integrate, producing floury streaks in the crumb. Use a bench scraper and wet hands instead of adding flour.
The Bottom Line
Start simple, build skills, and bake often. The Saturday White teaches you what bread is. The Overnight White teaches you what patience does. The six-fold method teaches you what gluten is. The shaped boule teaches you what craft looks like. And sourdough teaches you what living dough feels like.
Five recipes. Five skill levels. One trajectory toward bread that is genuinely yours.
Use Baker’s Bench to scale any of these formulas to your flour weight, and Starter Clock to dial in your leaven timing when you reach recipe 5.
Frequently Asked Questions
- What is the easiest bread to bake for a complete beginner?
- Ken Forkish's Saturday White Bread is the ideal starting point. It uses just four ingredients (flour, water, salt, instant yeast), requires no overnight wait or preferment, and bakes in a Dutch oven — which handles steam for you. Mix at 9:30 AM, bake at 4:15 PM. The moderate hydration (72%) produces workable dough, and Forkish's seam-side-up technique means you do not even need to learn scoring yet.
- Do I need a stand mixer to make bread?
- No. All five recipes in this guide can be made entirely by hand. Ken Forkish's pincer method and Jeffrey Hamelman's six-fold technique both develop gluten without a mixer. In fact, hand mixing gives you better feel for the dough — you learn to recognize when it is ready by touch, which is a skill a stand mixer cannot teach. A stand mixer becomes useful for enriched breads like brioche, but it is not needed for lean bread.
- How do I know when my bread dough has fermented long enough?
- Look for visual cues: the dough should have increased in volume (the target varies by recipe — tripled for Saturday White, 20-30% for sourdough), the surface should be domed and slightly jiggly, and you should see air bubbles. The poke test also works for proofing: press a floured finger gently into the dough. If it springs back slowly and leaves a slight indent, it is ready. If it snaps back immediately, it needs more time.
- What equipment do I absolutely need to start baking bread?
- A kitchen scale (non-negotiable — all authors insist on weighing, not measuring by volume), a Dutch oven (4 quart or larger, for steam), and a probe thermometer (for water temperature and checking internal doneness). A bench scraper and clear container for tracking fermentation are also very helpful. Everything else — bannetons, lames, baking stones — can wait until you have baked 5-10 loaves.
- When should I try sourdough?
- After you have baked several yeasted loaves and are comfortable with mixing, folding, shaping, and judging fermentation by volume and feel. Sourdough adds new variables — leaven building, float test timing, and slower, less predictable fermentation — that are much easier to manage when you already understand the fundamentals. Most bakers are ready after 5-10 yeasted loaves.