Every loaf of bread expands in the oven. The gas inside heats up, the yeast fires off one last burst of CO2 before it dies, ethanol vaporizes, and water turns to steam. All of that pressure needs somewhere to go. If you’ve given it a planned exit route, the loaf opens cleanly along your score marks. If you haven’t, the dough rips wherever it’s weakest — and that’s the ugly, jagged crack you’re staring at.
The good news: bread cracking is one of the most diagnosable problems in baking. There are really only four causes, and each one leaves a different kind of evidence on the loaf.
The Four Causes of Bread Cracking
Bread cracks when internal pressure exceeds the strength of the outer skin at an uncontrolled point. As Buehler puts it, “Scoring provides a weak spot for the expanding loaf to break through in a controlled way, rather than ripping unpredictably.” When that weak spot doesn’t exist — or exists in the wrong place — the loaf finds its own way out.
Here are the four causes, ranked from most common to least:
- Insufficient or no scoring — no controlled weak spot for expansion
- Under-proofing — too much oven spring with nowhere to go
- Excessive surface tension from shaping — outer skin is too tight
- Oven temperature or steam problems — crust sets before the loaf finishes expanding
Most cracked loaves involve a combination of two or more of these. An under-proofed loaf that wasn’t scored deeply enough is the classic double-fault.
Bread Cracks — Diagnosis Guide
| Crack Type | What It Looks Like | Primary Cause | Fix |
|---|---|---|---|
| Side Blowout | Bulge or tear along one side, rough interior surface | Under-proofing + no/shallow scoring | Longer proof time, deeper score cuts |
| Bottom Split | Crack where loaf meets baking surface | Under-proofing — expansion finds weakest point at base | Use poke test, bake when indent fills slowly |
| Random Top Crack | Jagged, asymmetrical tear across the top | No scoring — no controlled weak spot for expansion | Score with lame at 30-degree angle before baking |
| Surface Fissure | Clean split along top, almost looks intentional | Over-tight shaping — surface can’t stretch | Longer bench rest, less aggressive shaping |
| Crust Fracture | Network of small cracks across the surface | Crust set too early from insufficient steam | More steam in first 15 min; use Dutch oven |
| Score-Line Ear (GOOD) | Clean opening along score, glossy interior, lifted flap | Correct scoring + proper proof — this is the goal | No fix needed — this is what success looks like |
The poke test is your best pre-bake diagnostic. Press a floured finger 1/2 inch into the dough — it should spring back slowly and partially.
Cause 1: Insufficient or No Scoring
Scoring is deliberate damage. You’re cutting through the taut outer skin of the loaf so that expansion happens at the score line instead of at some random weak point. Without that cut, the dough rips wherever the surface tension is lowest — usually along the sides or bottom of the loaf, producing irregular blowouts.
The depth and angle of the score matter. For a properly proofed loaf, medium-depth cuts (about 1/4 to 1/2 inch) at a 30-degree angle are standard. The interaction between scoring depth and proofing stage is one of the most important relationships in bread baking:
- Under-proofed dough needs deeper cuts. There’s vigorous expansion ahead, and shallow scores won’t be enough to relieve the pressure.
- Properly proofed dough needs medium-depth cuts. The expansion is moderate and controlled.
- Over-proofed dough needs very shallow cuts. The gluten is already exhausted, and deep cuts risk deflating the loaf entirely.
If you’re not scoring at all and getting random cracks, the simplest fix is to start scoring. A sharp razor blade or lame at a confident angle will transform those unpredictable rips into clean, attractive openings. For a complete walkthrough on technique, see our guide on how to score bread.
The Forkish Exception: Baking Seam-Side Up
Not every baker scores. Ken Forkish deliberately skips scoring altogether, instead baking his loaves seam-side up and letting the natural seam split during oven spring. The seam itself acts as the controlled weak spot — it’s already the thinnest, least-sealed part of the surface.
This is actually a legitimate alternative to scoring, not a shortcut. The result is organic, rustic fissures that Forkish describes as the natural character of the bread. If you prefer this look, shape your loaf, place it seam-side down in the proofing basket, then flip it seam-side up onto the baking surface. The seam opens naturally in the heat.
The key distinction: Forkish’s seam splits are controlled because the seam IS the weak spot. Random cracks on a loaf that was baked seam-side down and not scored — that’s the problem.
Cause 2: Under-Proofing
Under-proofed bread has too much expansion left in it when it hits the oven. The yeast is still vigorous, there’s plenty of fermentable sugar remaining, and the dough hasn’t used up its rising potential. All four mechanisms of oven spring fire at full power: enzyme speed-up, CO2 coming out of solution, ethanol and water vaporizing, and thermal gas expansion.
That much expansion needs a large, deep score to accommodate it. If the scoring is modest — or absent — the pressure blows out wherever the surface is weakest. You’ll typically see:
- A bulge or tear along one side of the loaf
- A split along the bottom where the dough meets the baking surface
- An asymmetrical blowout where one side of the score opens massively while the other stays sealed
The poke test is your best diagnostic tool before baking. Press a floured finger about half an inch into the dough surface. If it springs back immediately and completely, the dough is under-proofed. Give it more time. You want the indent to fill in slowly and partially — that slow, incomplete rebound means the gluten has relaxed enough and the gas structure is mature.
For straight doughs with commercial yeast, the proofing window can be surprisingly narrow — as little as 10-15 minutes between under-proofed and over-proofed. Levain breads are more forgiving, with a window of 2 or more hours, because their fermentation evolves more slowly.
Cause 3: Too Much Surface Tension
Surface tension is the goal of shaping. You’re creating a taut outer skin that holds the loaf’s shape during proofing and contributes to upward oven spring. But there’s a limit. If the surface is stretched too tight — from aggressive pre-shaping, too many rounds of tightening on the bench, or shaping dough that hasn’t had enough bench rest — the outer layer becomes a pressure vessel with no give.
When that over-tight skin hits the oven, the interior expands but the exterior can’t stretch. The result is a crack, usually a clean split along the top or side that looks almost like a score line but wasn’t intentional.
The fix involves your shaping technique. After pre-shaping, give the dough a full bench rest of 15-30 minutes. This allows the gluten to relax and become extensible again before final shaping. During final shaping, aim for a smooth, taut surface — but not drum-tight. If the dough keeps fighting you and snapping back aggressively, it needs more rest time.
Robertson shapes on an unfloured surface, using the stickiness of the dough against the counter to build tension. This technique naturally limits how tight you can make the surface, because the dough’s own adhesion provides feedback. If you’re shaping on a floured surface (as Hamelman and Reinhart recommend), it’s easier to over-tighten because the dough slides freely.
Cause 4: Oven and Steam Problems
The crust forms when the dough surface dries out and the starches set. Steam delays this process — it keeps the surface moist and extensible during the critical first 10-15 minutes of baking, giving the loaf time to expand before the crust locks in place.
Without adequate steam, the crust sets too early. The interior is still expanding, but the outer shell has already hardened. Something has to give, and it gives as a crack.
If you’re baking in a Dutch oven, steam is generally not a problem — the sealed vessel traps the moisture released from the dough itself. Robertson bakes lid-on for 20 minutes at 500 degrees F, then removes the lid for caramelization. Forkish goes 30 minutes lid-on at 475 degrees F. Both methods provide ample steam.
If you’re baking on a stone or steel without a Dutch oven, steam management becomes more critical. Preheat a heavy pan on the rack below, pour about a cup of hot water into it at loading, and close the oven quickly. Vent after 15 minutes to let the crust crisp.
An oven that runs too hot can also cause cracking. If the outer surface sets before the interior has finished expanding, the pressure differential creates fissures. Use an oven thermometer — most home ovens are off by 25-50 degrees F.
Controlled Splits vs. Problem Cracks: How to Tell the Difference
Not all cracks are bad. A loaf that splits along the score line, opening into a clean “ear” with a smooth, glossy interior surface — that’s exactly what’s supposed to happen. The score controlled the expansion, and the result is attractive and intentional.
Here’s how to distinguish good splits from bad cracks:
Controlled split (good):
- Opens along the score line
- Interior surface is smooth and slightly glossy (gelatinized starch)
- Symmetrical expansion
- “Ear” formation where the scored flap lifts
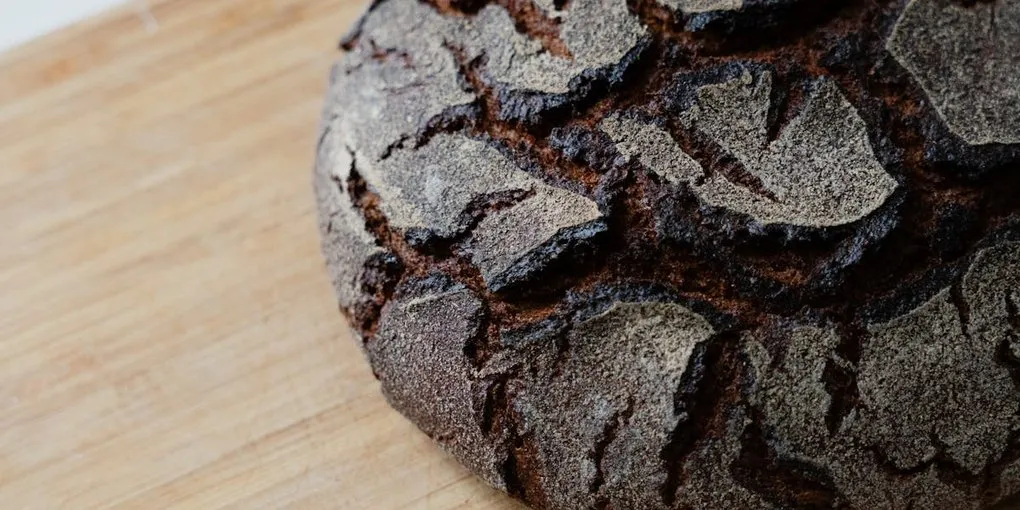
Random crack/blowout (problem):
- Appears on a side, bottom, or area far from any score
- Interior surface is rough, matte, or torn
- Asymmetrical — one side bulges while the other stays flat
- Jagged edges rather than clean opening
Seam split (intentional, Forkish method):
- Opens along the top where the seam was placed upward
- Organic, irregular pattern
- Multiple fissures rather than one clean line
- Rough, rustic appearance
Quick Diagnostic Checklist
When your bread cracks, work through these questions:
- Did you score? If not, that’s likely the primary issue. Start scoring, or try baking seam-side up.
- How did the poke test look before baking? If the dough bounced back fast, it was under-proofed. Give it more time next time, or score more deeply to compensate.
- How tight was the shaping? If you had to fight the dough to shape it, give it a longer bench rest.
- Where was the steam? If baking on a stone, did you add steam? If in a Dutch oven, was the lid on for the first phase?
- What’s your oven doing? Check the actual temperature with a thermometer. Home ovens lie.
For a complete walkthrough of bread problems and their fixes, see our bread troubleshooting guide.
The Under-Proofing and Scoring Connection
The most common scenario for cracked bread is a combination of under-proofing and inadequate scoring. Here’s why these two factors compound each other.
Under-proofed dough has enormous expansion potential. The yeast hasn’t finished its work, and when the dough hits 77-122 degrees F in the oven, fermentation accelerates dramatically before the yeast reaches its thermal death point around 140 degrees F. This rapid gas production drives aggressive oven spring.
If the scoring is shallow — appropriate for a fully proofed loaf but not for an under-proofed one — the score opens partially, then the expansion overwhelms it. The remaining pressure blows out the sides or bottom.
The fix is either better proofing (use the poke test, be patient) or deeper scoring if you know the loaf is slightly under-proofed. Both approaches work. Learning to read your dough’s proofing state and adjust your scoring depth accordingly is one of the more advanced bread skills, but it’s the single biggest quality-of-life improvement for avoiding cracked loaves.
For more on reading proofing signs, see our overproofed vs. underproofed guide. For scoring technique, see how to score bread.
Frequently Asked Questions
- Why does my bread crack on the side instead of the top?
- Side cracks almost always mean under-proofing combined with insufficient scoring. The dough has so much expansion potential that it overwhelms any score marks on top and blows out where the surface tension is weakest — usually the side near the base. The fix is either longer proofing (use the poke test: the indent should fill back slowly and partially) or deeper score cuts to give the expansion a better exit path.
- Can I skip scoring and still avoid cracks?
- Yes — but you need to provide an alternative weak spot. Ken Forkish bakes all his loaves seam-side up without scoring, letting the natural seam split during oven spring. The seam is already the thinnest part of the surface, so it acts as a controlled release point. If you bake seam-side down and don't score, the dough will crack wherever it's weakest, which is rarely where you want it.
- Does bread cracking mean it's ruined?
- No. Cracked bread tastes exactly the same as bread that opened cleanly along a score line. The difference is purely aesthetic. A random blowout or side crack means your technique can improve, but the loaf is still perfectly good to eat.
- How deep should I score bread to prevent cracking?
- Scoring depth depends on proofing stage. Under-proofed dough needs deeper cuts (1/2 inch or more) because vigorous expansion is coming. Properly proofed dough needs medium-depth cuts (about 1/4 to 1/2 inch). Over-proofed dough needs very shallow cuts — deep scoring on over-proofed dough will deflate the loaf rather than help it expand.
- Why does my bread crack even though I scored it?
- The score wasn't deep enough or was in the wrong position. If the dough is under-proofed, a shallow score gets overwhelmed by the expansion and the loaf blows out elsewhere. Other causes: the score sealed shut during proofing (oil or wet the blade), or the crust set too fast from lack of steam, forcing expansion through the score line AND through cracks. Check your steam setup — in a Dutch oven, keep the lid on for the first 20-30 minutes.