A real bagel is dense, chewy, and has a thin crust with a malty sheen. It resists your teeth for a moment before giving way. It does not taste like a round piece of sandwich bread with a hole in it.
The difference between a genuine bagel and a bread roll shaped like one comes down to two things: a stiff, low-hydration dough and a boiling step before baking. Skip either one and you get soft, puffy bread. Nail both and you get bagels that stand up to a thick smear of cream cheese without collapsing into mush.
The whole process takes about 3 hours of active time spread across two days — you shape the bagels one evening, retard them overnight in the fridge, then boil and bake the next morning. Weekend project territory.
Why Bagel Dough Is Different
Bagel dough runs at 55-58% hydration, which puts it firmly in the “stiff, easy to shape” range. For comparison, a typical artisan bread dough sits at 65-75%. This low water content is what gives bagels their characteristic dense, chewy crumb. There’s simply less water to create large gas pockets during fermentation.
The stiffness also means the dough takes more effort to mix. A stand mixer on second speed for 8-10 minutes is the practical path — hand kneading a 55% hydration dough is a genuine workout. The dough is ready when it’s smooth, firm, and passes a windowpane test — it should stretch thin without tearing, though it won’t be as extensible as a wetter dough.
Salt sits at 2%, the consensus standard across professional baking literature. Instant dry yeast at 1% gives enough lift for the overnight retard without over-fermenting.
The Malt Question
Malt shows up twice in bagel making — optionally in the dough and definitely in the boiling water — and it serves different purposes in each place.
In the dough (optional): Diastatic malt powder contains live amylase enzymes that break down starch into fermentable sugars. At 0.5% of flour weight, it gives yeast extra food during the long overnight retard and deepens crust color through the Maillard reaction. This is a technique Reinhart specifically recommends for bagels.
In the boiling water (required): Non-diastatic malt syrup — the heat-treated kind with no live enzymes — adds sweetness and contributes to the signature mahogany-brown, slightly glossy crust. Barley malt syrup is traditional. Honey works as a substitute. Sugar works in a pinch but produces a less complex flavor.
The distinction matters. Diastatic malt is a fermentation tool. Non-diastatic malt is a flavor and color tool. If your malt says “diastatic” on the label, use it in the dough. For the boiling water, you want non-diastatic (or plain barley malt syrup from the grocery store). For more on this topic, see our diastatic malt guide.
The Recipe
Yield: 8 bagels
Ingredients
| Ingredient | Weight | Baker’s % |
|---|---|---|
| Bread flour | 500g | 100% |
| Water, room temp (68-72F) | 280g | 56% |
| Salt | 10g | 2% |
| Instant dry yeast | 5g | 1% |
| Non-diastatic malt syrup (dough) | 15g | 3% |
| Diastatic malt powder (optional) | 2.5g | 0.5% |
For the boiling water:
- 3 quarts water
- 2 tablespoons non-diastatic barley malt syrup (or honey)
Total hydration: 56%. This is a stiff dough — expect it to feel dry at first. It comes together with mixing time.
Equipment
- Kitchen scale
- Stand mixer with dough hook
- Large pot (for boiling)
- Slotted spoon or spider strainer
- Sheet pan with parchment
- Probe thermometer
Method
Step 1: Mix the Dough
Combine flour, salt, yeast, malt syrup, and diastatic malt (if using) in a stand mixer bowl. Add the water. Mix on low speed for 3 minutes until a shaggy mass forms — it will look rough and dry. Switch to medium speed and mix for 8-10 minutes.
The dough is ready when it’s smooth, stiff, and pulls cleanly from the bowl sides. It should feel like a firm rubber ball — significantly stiffer than bread dough. If it’s still ragged after 10 minutes, add water 5g at a time. If it’s sticky, add flour 10g at a time.
Final dough temperature should land around 76-78F. The friction from mixing this stiff dough generates significant heat — roughly 24-28F in a stand mixer — so use room temperature water, not warm.
Step 2: Bulk Fermentation (1 hour)
Cover the dough and let it rest at room temperature for 1 hour. It won’t double — a 50-60% volume increase is the target with this stiff dough. The low hydration limits gas cell expansion, so don’t wait for a dramatic rise.
Step 3: Divide and Shape
Divide the dough into 8 equal pieces (about 100-105g each). Shape each piece into a tight ball by cupping your hand around it and rotating it against the counter, using the friction of the surface to build surface tension.
The poke-through method (easiest): Push your thumb through the center of the ball and rotate, stretching the hole to about 2 inches in diameter. The hole will shrink during proofing and boiling — start bigger than you think you need. A finished bagel’s hole should be about 1-1.5 inches. If you make it 2 inches now, it’ll land right.
The rope method (traditional): Roll each ball into a rope about 9 inches long, slightly thicker in the middle. Wrap the rope around your hand, overlapping the ends by about 1.5 inches at your palm. Roll the overlapping section against the counter to seal. This produces a more uniform ring but takes practice.
Place shaped bagels on a parchment-lined sheet pan, spaced 2 inches apart.
Step 4: Overnight Retard (8-16 hours)
Cover the pan tightly with plastic wrap and refrigerate overnight. The cold retard serves three purposes: it develops flavor through slow fermentation (acetic acid bacteria remain slightly active even at fridge temperatures), it firms the dough for easier handling during boiling, and it gives you a schedule — shape at night, boil and bake in the morning.
The float test for readiness: Before boiling the next morning, drop one bagel into a bowl of room-temperature water. If it floats within 10-15 seconds, the bagels are properly proofed and ready to boil. If it sinks like a stone, let the bagels sit at room temperature for 15-20 minutes and test again.
Step 5: Boil
Preheat your oven to 450F. Bring 3 quarts of water to a rolling boil and add the barley malt syrup.
Working in batches of 2-3, drop the bagels into the boiling water. They’ll sink briefly, then float. Boil 45-60 seconds per side, flipping once with a slotted spoon.
What happens during the boil: The boiling water gelatinizes the starch on the bagel’s surface. Wheat starch gelatinizes at 140-158F — well below the 212F boiling point — so this happens almost instantly. The gelatinized starch forms a thin, glossy skin that sets the bagel’s shape, limits further oven spring during baking (keeping the dense interior), and creates the characteristic chewy crust after baking. The malt in the water contributes color and a subtle sweetness that caramelizes during baking.
A shorter boil (30 seconds per side) produces a thinner crust and slightly puffier bagel. A longer boil (90 seconds per side) produces a thicker, chewier crust and denser crumb. Sixty seconds per side is the sweet spot for most people.
Place boiled bagels back on the parchment-lined sheet pan.
Step 6: Top and Bake
If using toppings (sesame, poppy, everything mix, salt), press them onto the wet surface of the boiled bagels immediately — the gelatinized starch acts as natural glue. Once the surface dries, toppings won’t stick.
Bake at 450F for 18-22 minutes, rotating the pan halfway through. The bagels are done when they’re deep golden brown all over — not pale tan, but genuinely dark gold. The Maillard reaction needs that full baking time to develop proper crust flavor. Internal temperature should read 200-205F.
Let cool on a wire rack for at least 15 minutes. The crumb continues to set as residual heat works through the interior.
Why the Boil Matters — The Science
The boiling step is not optional and not just tradition. It’s the single thing that separates bagels from round bread.
When raw dough hits boiling water, three things happen simultaneously:
-
Starch gelatinization. The outer layer of starch granules absorbs water and swells, forming a gel. For wheat, this happens between 140-158F. Since the water is at 212F, the surface gelatinizes almost immediately, forming a thin, smooth skin.
-
Protein coagulation. The gluten proteins on the surface denature and set, reinforcing the gelatinized starch layer. Together, the set starch and protein create a barrier that limits how much the bagel can expand in the oven.
-
Limited oven spring. Because the surface is already set before baking begins, the bagel can’t puff up freely in the oven. This forced density is what gives bagels their characteristic chew. Without the boil, the dough expands like regular bread — open, soft, airy.
The malt in the boiling water adds reducing sugars to the surface. During baking, those sugars react with amino acids through the Maillard reaction — amino acid plus reducing sugar yielding brown pigments and hundreds of flavor compounds. This is why malt-boiled bagels have a deeper, more complex crust color and flavor than bagels boiled in plain water.
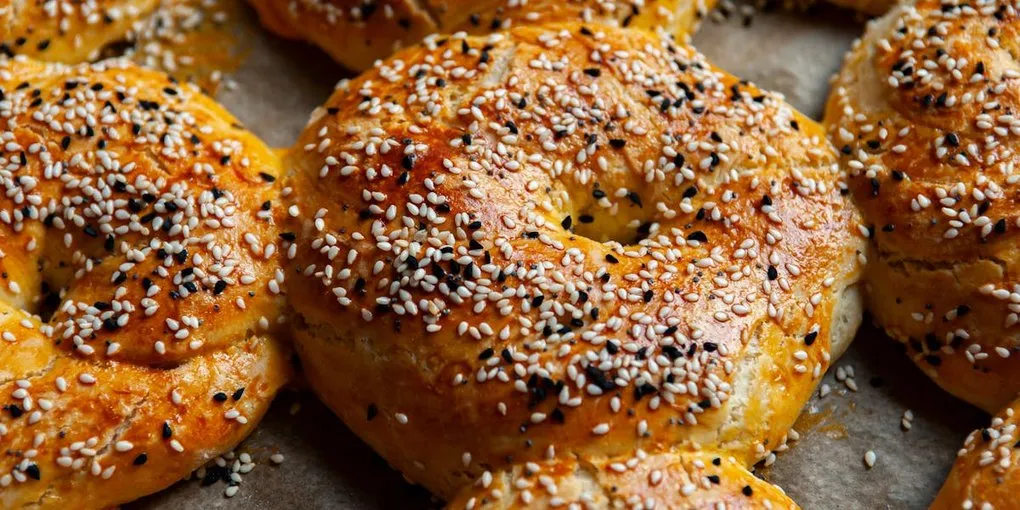
Toppings
The classic everything bagel mix: sesame seeds, poppy seeds, dried minced garlic, dried minced onion, and flaky sea salt. Mix in roughly equal parts. Press firmly into the wet, freshly boiled surface.
Other options: plain (no topping — lets the malt crust shine), sesame only, poppy only, coarse salt only, onion only, or cinnamon-raisin (add 2 teaspoons cinnamon and 100g raisins to the dough during mixing).
Storing Bagels
Fresh bagels are best within 6-8 hours of baking. The starch retrogradation that causes staling begins immediately — and since bagels have less fat and sugar than enriched breads, they go stale faster. By day two, they need toasting.
Freezing: Slice the bagels before freezing, then freeze in a single layer on a sheet pan for 30 minutes before transferring to a freezer bag. Toast directly from frozen. Frozen bagels keep for 2-3 months with no quality loss. For more on bread storage science, see our bread storage guide.
Troubleshooting
Bagels are too puffy/soft: The dough was too wet (hydration too high), the boil was too short, or the bagels over-proofed. Tighten up hydration to 55%, boil a full 60 seconds per side, and test with the float method before boiling.
Bagels are too dense and tough: Over-mixed or under-proofed. Reduce mixing time by 2 minutes, and make sure the bagels pass the float test before boiling.
Crust is pale: The boiling water didn’t have enough malt, or the oven temperature was too low. Use a full 2 tablespoons of malt syrup and verify oven temp with a thermometer.
Toppings fell off: Applied after the boiled surface dried. Toppings must go on immediately after boiling, while the gelatinized starch is still wet and sticky.
Hole closed up: Started too small. Make the hole 2 inches during shaping — it shrinks during proofing, boiling, and baking.
For more troubleshooting tips across all bread types, see our bread troubleshooting guide.
For baker’s percentage calculations and batch scaling, the Baker’s Bench tool handles bagel formulas and will adjust ingredient weights for any batch size.
Frequently Asked Questions
- Can I make bagels without boiling them?
- You can bake the shaped dough directly, but the result is a round bread roll, not a bagel. The boiling step gelatinizes the surface starch at 140-158F, creating the thin skin that limits oven spring and produces the dense, chewy interior. Without it, the dough expands freely in the oven and you get soft, puffy bread with a hole in it. The boil is what makes a bagel a bagel.
- What is the difference between diastatic and non-diastatic malt in bagels?
- Diastatic malt contains live amylase enzymes that break starch into fermentable sugars -- it goes in the dough to feed yeast during the overnight retard and improve crust browning. Non-diastatic malt has been heat-treated to deactivate enzymes -- it goes in the boiling water purely for flavor and color. Use diastatic in the dough (optional, 0.5% of flour weight), non-diastatic in the boil (required, about 2 tablespoons).
- Why are my homemade bagels too soft and bread-like?
- Three likely causes: hydration too high (should be 55-58%, not 65%+), boiling time too short (need 45-60 seconds per side), or over-proofed before boiling. Bagels need a stiff dough -- significantly stiffer than regular bread dough -- to achieve their dense chew. The float test helps nail proofing: if the bagel floats within 10-15 seconds in room-temperature water, it's ready.
- Can I skip the overnight retard and make bagels same-day?
- Yes. After shaping, let the bagels proof at room temperature for about 20-30 minutes until they pass the float test, then boil and bake. The overnight retard develops more complex flavor through slow, cold fermentation, but same-day bagels still taste significantly better than store-bought. The trade-off is flavor depth, not structure.
- How do I keep toppings from falling off my bagels?
- Press toppings onto the bagels immediately after boiling, while the gelatinized surface starch is still wet. The starch acts as a natural adhesive. Once the surface dries -- even for a few minutes -- toppings won't adhere. For extra insurance, press the toppings firmly into the surface rather than sprinkling them on.