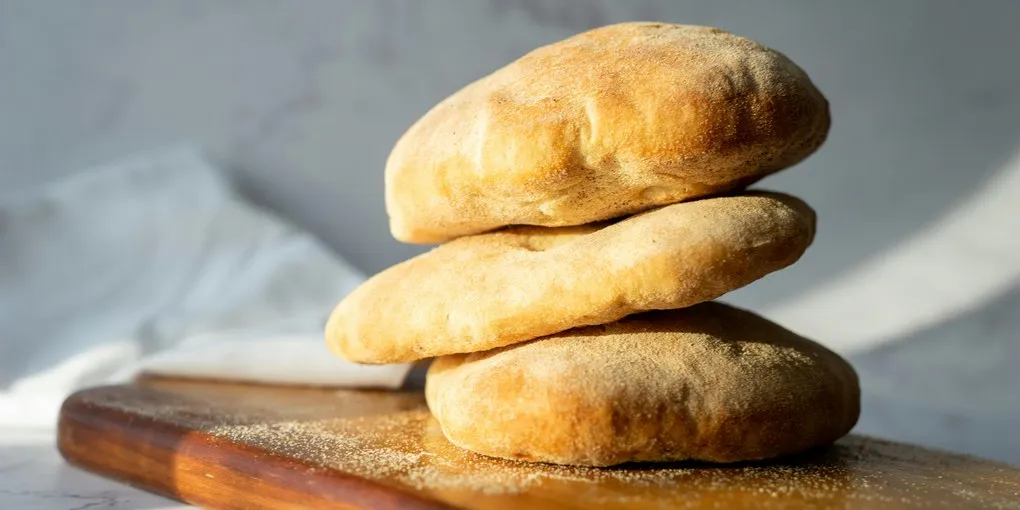
Pita bread is one of the fastest breads you can make from scratch. The dough is simple — flour, water, yeast, salt, and a small amount of olive oil. The shaping is forgiving. And the bake takes about 3 minutes per batch. The whole process from measuring flour to pulling the last puff from the oven is under 2 hours, with most of that being hands-off rise time.
The real magic is the pocket. When a thin round of dough hits a screaming-hot oven, the water inside rapidly converts to steam. That steam inflates the dough like a balloon, separating the top layer from the bottom and creating a single large cavity — the pocket you tear open and fill. It’s one of the most satisfying things in bread baking: you watch a flat disc of dough puff into a pillow in real time.
How the Pocket Forms
The pocket in pita bread is a product of rapid steam generation inside a thin dough at extreme heat. When the dough enters a 500-550°F oven, several things happen simultaneously.
First, the water distributed throughout the dough rapidly heats and converts to steam. Buehler identifies vapor pressure increase as one of the four mechanisms of oven spring — ethanol and water vaporize inside gas cells, expanding them dramatically. In pita, this effect is amplified because the dough is thin (about 1/4 inch) and the oven is much hotter than a typical bread bake.
Second, existing gas bubbles from fermentation undergo thermal expansion. The CO₂ already trapped in the dough expands as temperature rises, contributing to the initial inflation.
Third, dissolved CO₂ comes out of solution. CO₂ is more soluble at lower temperatures — as the dough heats rapidly, that dissolved gas joins the vapor phase and adds to the internal pressure.
All of this happens before the starch gelatinizes (60-70°C / 140-158°F) and the gluten coagulates (60-80°C / 140-176°F) to lock the structure in place. The result: the top and bottom layers of dough separate, steam fills the gap, and the structure sets around the cavity. The entire puff happens in the first 60-90 seconds of baking.
For the pocket to form reliably, three things must be true: the dough must be rolled thin and even (no thick spots that resist separation), the oven must be genuinely hot (500°F minimum), and the dough must not be over-proofed (over-proofed dough has exhausted its gas reserves and won’t inflate).
For more on how oven spring works across all bread types, see our baking with steam guide.
The Recipe
Yield: 8 pita breads
Ingredients
| Ingredient | Weight | Baker’s % |
|---|---|---|
| Bread flour | 500g | 100% |
| Water, warm (90-95°F) | 300g | 60% |
| Olive oil | 15g | 3% |
| Salt | 10g | 2% |
| Instant dry yeast | 5g | 1% |
| Sugar | 5g | 1% |
Total hydration: 60%. This is a medium-stiff dough — firm enough to roll flat without sticking, soft enough to puff dramatically in the oven. The small amount of olive oil adds pliability and a subtle richness without interfering with the pocket formation.
Equipment
- Kitchen scale
- Baking steel or baking stone (inverted sheet pan works in a pinch)
- Rolling pin
- Parchment paper or flour-dusted peel
- Oven that reaches 500°F or higher
Method
Step 1: Mix the Dough
Combine flour, sugar, yeast, and salt in a large bowl. Add the warm water and olive oil. Mix with a wooden spoon until a shaggy mass forms, then turn out onto a clean surface and knead for 8-10 minutes by hand. The dough should be smooth, slightly tacky, and spring back when poked.
If using a stand mixer: combine on low speed for 2 minutes, then medium speed for 5-6 minutes with the dough hook. The finished dough should pull cleanly from the bowl sides.
The warm water (90-95°F) compensates for the cooling effect of flour and friction. With room temperature at 72°F and minimal hand-mixing friction, the final dough temperature should land around 76-78°F — right in the target range for lean dough fermentation.
Step 2: Bulk Fermentation (45-60 minutes)
Place the dough in a lightly oiled bowl, cover with a damp towel or plastic wrap, and let rise at room temperature until roughly doubled. At 1% yeast and 76-78°F dough temperature, this takes 45-60 minutes.
The dough should feel puffy and light. A gentle poke should leave an indent that slowly fills back in. For more on how temperature affects fermentation speed, see the bulk fermentation guide.
Step 3: Divide and Shape
Turn the dough out onto a lightly floured surface. Divide into 8 equal pieces (about 105g each). Shape each piece into a tight ball by cupping your hand over it and rolling in a circular motion against the counter surface. The counter friction creates surface tension — the same principle behind shaping any bread dough.
Cover the balls with a towel and let rest 10 minutes. This bench rest relaxes the gluten, making rolling much easier. If you try to roll immediately, the dough will spring back stubbornly.
For more on shaping technique, see our bread shaping guide.
Step 4: Roll Flat
Roll each ball into a round approximately 7 inches in diameter and 1/4 inch thick. Use even pressure and rotate the dough 90 degrees between passes to keep it circular. Consistency matters — thick spots won’t puff properly because the steam can’t separate the layers where the dough is too dense.
Don’t stack rolled pitas or let them sit too long before baking. Roll 2-3 at a time, bake them, then roll the next batch while the oven recovers.
Step 5: Preheat and Bake
Place a baking steel or baking stone on the lowest oven rack. Preheat to 500-550°F for at least 30 minutes. The stone or steel must be thoroughly saturated with heat — a lukewarm surface won’t generate the explosive steam needed for pocket formation.
Transfer 2-3 rolled pitas directly onto the hot stone. Work quickly. Close the oven door immediately to trap the heat.
Bake for 2-3 minutes. The pitas will puff dramatically — most inflate within the first 60-90 seconds. Once puffed and lightly golden with a few brown spots, they’re done. Do not overbake — pita should stay soft and pliable, not crispy.
No steam injection needed. Unlike lean artisan bread, pita bakes so quickly that the internal steam does all the work. The oven is dry, the bake is fast, and the steam is internal.
Step 6: Cool and Stack
Remove pitas to a wire rack and immediately cover with a clean kitchen towel. The towel traps residual steam, which keeps the bread soft. Without the towel, the thin crust dries out and becomes stiff within minutes.
Stack the pitas as they come out of the oven, always under the towel. They’ll stay warm and pliable for 15-20 minutes — plenty of time to bake the remaining batches.
Troubleshooting Pocket Formation
Pita didn’t puff at all: The oven wasn’t hot enough, or the dough was rolled unevenly. Check your oven with a thermometer — many home ovens run 25-50°F cooler than the display says. Roll more carefully, aiming for even 1/4-inch thickness throughout.
Pita puffed on one side but not the other: Uneven rolling. One side was thicker and resisted separation. Practice rolling with lighter, more consistent pressure.
Pita puffed but deflated immediately: Over-proofed. The gluten structure was too weak to hold the steam. Reduce the rest time before baking or reduce bulk fermentation time.
Pita was crispy instead of soft: Over-baked. Pull them at 2-3 minutes — as soon as they puff and show light browning. Cover immediately with a towel.
For general bread troubleshooting, see our bread troubleshooting guide.
Variations
Whole wheat pita: Replace 30-40% of the bread flour with whole wheat flour. Increase water by 15-20g to compensate for bran absorption. The pita will be denser and nuttier — the pocket may be slightly less dramatic but still forms.
Garlic herb pita: Add 2 cloves of minced garlic and 1 tablespoon of dried oregano or za’atar to the dough during mixing. Brush with olive oil immediately after baking.
Thicker pocket pita: Roll to 3/8 inch instead of 1/4 inch. You’ll get a chewier bread with a smaller pocket — closer to what you find at Middle Eastern restaurants that serve bread warm from a tandoor or deck oven.
No-pocket flatbread: If you want soft flatbreads without the pocket (for wraps or dipping), dock the rolled rounds with a fork before baking. The holes release steam and prevent inflation.
Pita vs. Naan: Two Different Flatbreads
Pita and naan get confused, but the technique and texture are different breads entirely.
Pita is lean (just flour, water, salt, yeast, and a touch of olive oil), leavened with yeast only, and baked in a very hot oven at 500-550°F. The extreme oven heat inflates the pocket — steam separates the top and bottom layers of the thin dough. Middle Eastern origin (Lebanese, Syrian, Palestinian, Israeli traditions).
Naan is enriched (yogurt, oil or ghee, sometimes egg), uses both yeast and baking powder, and is traditionally cooked on the wall of a tandoor or on a skillet at 500-550°F. Naan puffs with large bubbles but does not form a single pocket because the hot surface contact holds the bottom layer in place. Indian and South Asian origin.
If you want a focused comparison with focaccia, chapati, and tortilla, the flatbread field guide in our naan article breaks down leavening, hydration, and cook temp across every major flatbread style.
Storing Pita Bread
Pita keeps well at room temperature in a sealed bag for 3-4 days. The olive oil in the dough slows staling slightly compared to a purely lean bread. For longer storage, freeze in a single layer, then stack in a freezer bag once frozen. Reheat directly from frozen — 30 seconds in a hot skillet or 1 minute in a warm oven.
Unlike artisan sourdough, pita is not a bread that improves with age. Eat it the same day if possible, or freeze what you won’t use within 48 hours. The thin structure means staling is noticeable faster than in thicker loaves.
Frequently Asked Questions
- What temperature do you bake pita bread at?
- Pita bread bakes at 500-550°F — much hotter than standard bread. The extreme heat is what creates the pocket. Water in the dough converts to steam almost instantly, inflating the thin round into a puffy pillow within 60-90 seconds. Preheat a baking stone or inverted sheet pan for at least 30 minutes so the surface is fully saturated with heat. Each pita bakes in just 2-3 minutes.
- Why didn't my pita bread puff up?
- The three most common causes are an oven that isn't hot enough, uneven rolling, and over-proofing. Check your oven temperature with a separate thermometer — many home ovens run 25-50°F below the set temperature. Roll each round to a consistent 1/4-inch thickness with no thick spots. And don't let the rolled rounds sit too long before baking — over-proofed dough has used up its gas reserves and won't inflate properly.
- Can you make pita bread without a baking stone?
- Yes. Flip a heavy sheet pan upside down and preheat it at 500°F for 30 minutes. The flat surface works like a makeshift baking stone. A cast-iron skillet also works for one pita at a time — preheat on the stovetop over high heat, then add the rolled dough. The skillet method gives you more control over individual pitas and works especially well if your oven doesn't reach 500°F reliably.
- How do you keep pita bread soft after baking?
- Stack the baked pitas under a clean kitchen towel immediately after pulling them from the oven. The towel traps residual steam, which keeps the thin bread pliable. Without the towel, the crust dries out within minutes and becomes stiff and crackly. Once fully cooled, store in a sealed plastic bag at room temperature for up to 3-4 days, or freeze for longer storage.
- Is pita bread the same as flatbread?
- Pita is one type of flatbread, but not all flatbreads are pita. The defining feature of pita is the pocket — the interior cavity created by rapid steam inflation at high heat. Other flatbreads like naan, lavash, and tortillas are cooked at lower temperatures or in different ways and don't form pockets. Pita's pocket makes it uniquely suited for stuffing with fillings, which is why it's the bread of choice for falafel, shawarma, and other filled sandwiches.