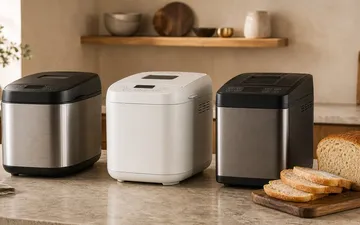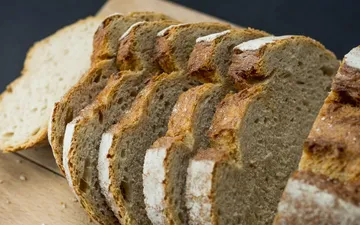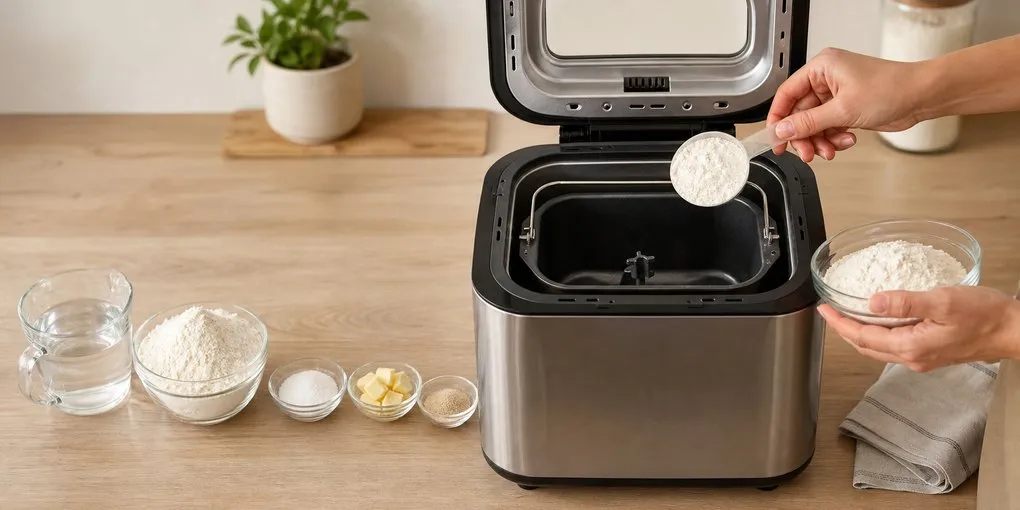
To use a bread machine, first find the manual for the exact model number. Fit the paddle, lock in the pan, weigh a formula that stays within the machine's flour limit, and load ingredients in the manual's order. Select the matching cycle, loaf size, and crust. Inspect wheat dough after 5-10 minutes of active kneading; it should form one soft, slightly tacky mass. Add inclusions at the signal, remove the hot loaf promptly with oven mitts, then unplug and cool the machine before cleaning. Never immerse the machine body, and do not use delayed start with perishable ingredients unless the manufacturer explicitly allows it.
A bread machine is simple only after you know which machine is on the counter. Two models can have nearly identical buttons and opposite loading instructions. One timer may show hours until the loaf is finished; another may describe a delayed start. One pan twists clockwise to lock; another presses straight down.
That is why the first step is not adding flour. It is finding the exact manual.
This guide covers the workflow shared by current Cuisinart, Breville, and Zojirushi machines while preserving the differences their manuals document. For machine recommendations, see the best bread machines compared. For complete gram-based formulas, use our bread machine recipes.
Bread Machine Workflow: 7-Stage Quick Reference
Manual first, then setup, dough control, baking, and cleanup
- 01
Identify
Before ingredientsRead the full model number and open the correct manufacturer manual.
Confirm capacity, loading order, pan lock, timer, and cleaning restrictions. - 02
Assemble
2 minutesSeat the paddle and lock the empty pan into the chamber.
Keep loose ingredients out of the heating chamber. - 03
Weigh + Load
5-10 minutesWeigh a compatible formula and load it in the manual's order.
For delay, keep yeast dry and avoid perishables. - 04
Program
Before StartSelect cycle, loaf size, crust, and permitted timer options.
Read the display back before pressing Start. - 05
Inspect
First kneadCheck dough after 5-10 minutes of active mixing.
Correct with water or flour in 5-gram increments. - 06
Finish
End signalRemove the hot pan, release the loaf, and cool on a rack.
Use oven mitts and nonmetal tools. - 07
Clean
After coolingUnplug, wash removable parts as directed, wipe the body, and dry.
Never immerse the machine body or electrical assembly.
A typical Basic loaf takes about 3-4 hours, but the exact schedule belongs to the model manual.
jayarrbread.comThe seven stages above are the shape of the job. The fourteen numbered sections that follow expand them into the detail each one actually needs — loading order and temperature sit inside Stage 3, cycle selection inside Stage 4, and cleaning inside Stage 7.
1. Identify the Machine and Find the Correct Manual
Read the rating label on the bottom or back of the appliance. Record the brand, complete model number, regional suffix, voltage, and wattage. A suffix can distinguish a US machine from a visually identical model designed for another electrical system or accessory set.
Do not rely on a marketplace title, a seller’s memory, or a manual for the “closest-looking” machine. The exact manual tells you:
- Maximum flour or loaf capacity by program
- Whether ingredients go wet-first or dry-first
- How the pan locks into the drive coupling
- Which cycles include a rest, preheat, add-in signal, or keep-warm stage
- Whether the timer counts to start or to completion
- Which parts may be washed, soaked, or placed in a dishwasher
- Model-specific error codes, parts, and service contacts
Save the PDF locally or print the cycle chart. The most useful pages are usually ingredient order, program timing, delayed-start warnings, cleaning, troubleshooting, and replacement parts.
2. Inspect the Machine Before First Use
Unplug the appliance and remove the pan. Look for damage before heat or motion can make it worse.
Power cord and plug: Do not use a machine with a cut, crushed, loose, scorched, or repaired cord. Bread machines draw sustained power while heating; this is not a place for a makeshift splice.
Baking chamber: It should be dry and free of flour, clips, packaging, and loose metal. Never pour ingredients directly into the chamber.
Pan coating: Replace a pan with peeling, blistered, deeply scratched, or flaking nonstick coating. Do not scrape it smooth and continue.
Drive shaft and coupling: The shaft in the pan should turn only as the manual describes, without severe wobble. The underside coupling should be clean and intact.
Kneading paddle: Confirm that it is the right blade for the model. A paddle that fits loosely, sits too high, or contacts the pan can damage both parts.
Place the machine on a stable, level, heat-resistant counter. Keep it away from the edge, water, curtains, and the heat-sensitive underside of a low cabinet. Preserve the vent clearance stated in the manual, including space for the lid to open fully.
3. Install the Bread Pan and Paddle
Start with the machine unplugged.
- Place the clean, dry paddle over the shaft in the bread pan. Press it down until fully seated; some designs feel slightly loose by intention.
- Put the empty pan into the baking chamber.
- Lock it using the model’s documented motion: this may be a twist, a firm push, or engagement with side clips.
- Lift gently by the handle to confirm it is retained, without forcing the mechanism.
If the pan will not lock, remove it and inspect the coupling orientation. Do not hammer the pan, pry the drive, or start the motor hoping it will pull itself into place.
Many manuals direct you to remove the pan again for loading. That protects the heating chamber from flour, salt, and liquid spills. If your manual uses that workflow, load the pan on a stable counter and reinstall it only after the ingredients are in.
4. Ingredients: Order, Temperature, and Measurement
A bread machine is unforgiving about ratios for one reason: the program never stops to look at the dough. A hand baker feels a dough going wrong and adds flour. The machine simply runs its schedule. That makes measurement the highest-leverage thing you control, and a digital scale eliminates the single largest source of error — the compressed cup of flour, which can vary by 20 grams or more depending only on how you dipped it.
Weigh the Formula
This is the one habit every baker on our reference shelf agrees on. Hamelman argues for working exclusively in grams; Forkish puts numbers to the stakes, noting that being off by as little as 20 or 30 grams changes dough consistency noticeably. In a fixed machine cycle, where you cannot compensate later, that margin matters more rather than less.
Put the pan directly on the scale if it sits securely, and tare between ingredients. Otherwise weigh each ingredient separately. Use a complete formula written for a loaf size your machine supports; the bread machine recipe pillar gives 1-, 1.5-, and 2-pound sandwich-loaf weights plus six variations.
Treat the manual’s flour maximum as a hard ceiling. A “two-pound” badge on the case is not permission to scale every recipe to two pounds — and the limit is not even constant within one machine, since sweet, whole-wheat, cake, and gluten-free programs often allow less. The Cuisinart CBK-210 caps total flour at 5 cups; its smaller sibling the CBK-110 stops at 4½; Breville recommends a 2- to 4.5-cup window of dry ingredients across its bread settings.
Follow the Model’s Ingredient Order
Current Cuisinart, Breville, and Zojirushi manuals commonly place liquids in the pan first, flour and dry ingredients above them, and yeast last in a shallow depression. Other machines reverse the sequence or dispense yeast separately. There is no universal order that overrides the manual.
When using a wet-first machine:
- Add water and other permitted liquids.
- Add butter or oil as directed.
- Cover the liquid with flour.
- Place sugar, dry milk, and salt around the flour away from the yeast well.
- Make a shallow depression that does not reach liquid, then add yeast.
When a recipe’s loading sequence and your machine’s instructions disagree, the machine wins. It is the one holding the yeast away from the salt.
Use the Temperature the Manual Expects
Ignore the generic advice to make every liquid “warm.” That instruction comes from hand baking, where you are steering toward a desired dough temperature yourself. An automatic machine is already doing that job: most are built around room-temperature or cool ingredients, and many run a programmed rest or preheat to bring everything to the temperature the schedule assumes. Pour in hot water and you start fermentation before the machine is ready for it, which is how a loaf ends up peaking and collapsing inside a cycle that was timed for something slower. Rapid programs are the exception, and only when their manual specifies a temperature range.
Keep Yeast Dry During a Delay
For immediate-start bread, all ingredients will mix within minutes. For delayed start, yeast may sit for hours. Keep it on dry flour and separate from liquid and concentrated salt until the program begins.
Use instant yeast, bread-machine yeast, active dry yeast, or another type only in the amount and manner the formula or manual supports. These labels are not always interchangeable gram for gram in a fixed cycle.
Delayed-Start Food Safety
Major manufacturer manuals warn against using delayed start with perishable ingredients such as eggs, liquid milk, cheese, yogurt, juice, and vegetables. Fresh pumpkin puree and similar moist ingredients also belong in an immediate-start formula. Do not assume the warm enclosed pan is safe refrigerated storage.
Use the timer only with a formula the manual explicitly permits. Many displays show the total time until completion, not the number of hours before mixing begins. Confirm that behavior before setting an overnight loaf.
5. Bread Machine Cycles and Settings
Cycle names are shorthand for a complete schedule. The machine may rest ingredients, knead once or twice, pause, ferment through several rises, degas, bake, and keep warm. Choosing a cycle means choosing all of those decisions at once.
| Cycle | What it is for | What to watch |
|---|---|---|
| Basic / White | Lean or moderately enriched wheat loaves | Default first loaf; often about 3-4 hours |
| Whole Wheat | Dough with substantial whole-grain flour | Often includes a longer rest or rise; do not substitute Rapid |
| Sweet | Higher sugar, fat, milk, egg, or fruit | Use light crust first because enriched dough browns faster |
| Rapid / Express | Manufacturer formulas designed for short timing | Often uses different yeast or liquid temperature; may disable timer and crust options |
| Gluten Free | Batter-like formulas without a wheat gluten network | Usually fewer rises and a different mix; use a complete gluten-free formula |
| Dough / Pizza Dough | Mixing, kneading, and fermentation without baking | Remove at the end, then shape, proof if needed, and bake elsewhere |
| Bake Only | Heat without kneading or fermentation | For a manual-approved finish or prepared batter; it cannot develop dough |
| Cake / Quick Bread | Chemically leavened batter | Not a shortcut for yeast bread; scrape only as the manual permits |
| Jam | Heated fruit-and-sugar preparation | Follow manufacturer quantities exactly to control boiling and overflow |
Loaf Size
The loaf-size button may alter baking time and sometimes kneading or rise time. Select the size that matches the formula, not the amount of bread you hope to get. Some cycles disable loaf-size selection because the schedule is fixed.
Crust Color
Crust control changes the baking profile. Start with medium for lean sandwich bread and light for recipes rich in sugar, milk, eggs, or fruit. If the machine has a lid heater or convection fan, its top crust may brown differently from an older recipe’s assumptions.
Custom Programs
Custom cycles are useful only when you know which stage needs changing. Record the factory schedule before editing it. Change one variable at a time, such as adding 15 minutes to the final rise, rather than rewriting knead, rise, and bake simultaneously.
6. Start the Machine and Read the Display
Close the lid, plug in the machine, and select program, loaf size, crust, and any timer setting. Then read every indicator back before you press Start — a wrong loaf size caught now costs two seconds, and caught in three hours costs a loaf.
Once it is running, check that the display has begun the countdown or phase you expect. Do not panic if nothing appears to happen: whole-wheat and gluten-free programs often open with a long temperature-equalization rest, and a machine sitting silently for twenty minutes is usually working exactly as designed. Consult the cycle chart before you cancel anything.
Keep the lid closed during baking unless the manual explicitly directs otherwise. Opening during early kneading is commonly permitted for a dough check; opening during proofing or baking releases heat and can collapse structure.
7. Inspect Dough During the First Knead
This is the whole game. The first active knead is the only moment in a three-hour cycle when the machine shows you whether the flour and water actually agree, and the only moment when a correction still costs nothing. Everything after it is commitment.
For a wheat sandwich dough, look 5 to 10 minutes after active mixing begins. The dough should:
- Gather into one coherent mass around the paddle
- Feel soft and slightly tacky rather than wet and pourable
- Clear most, though not necessarily all, of the pan walls
- Stretch rather than crumble when lifted with a safe tool after stopping, if inspection is needed
If dry flour is still riding in the corners and the dough feels stiff, add 5 grams of water at a time. If it smears across the bottom like thick batter, add 5 grams of bread flour at a time. Give the machine about a minute to work in each addition before judging the result.
Resist the urge to dump in a quarter cup and walk away. Five grams at a time keeps the formula essentially intact; a quarter cup rewrites it. Write down whatever correction you land on — that number is how your flour differs from the recipe’s, and it will be the same next month.
Gluten-free formulas are different. Many mix as a thick batter or paste rather than a stretchable ball. Use the visual target supplied with the exact formula; do not add wheat flour to make it behave like wheat dough. The science is explained in how gluten-free bread works.
Keep fingers, spoons, and spatulas away from the moving paddle. If a blade is not turning or a tool falls into the pan, stop and unplug the appliance before reaching inside.
8. Add Fruit, Nuts, Seeds, and Other Inclusions
Add-ins belong late in kneading. If loaded at the beginning, nuts can grind into the dough, dried fruit can shred, and sharp inclusions can interrupt gluten development.
Use an automatic dispenser only within its documented size and weight limits. Chop large nuts, separate sticky fruit, and keep the dispenser dry. Ingredients coated in syrup or oil can stick instead of releasing.
Without a dispenser, wait for the add-in signal. Open the lid briefly, scatter the inclusions across the dough, and close it. Do not reach into the pan or push ingredients beneath a moving paddle.
Cheese, fresh herbs, meat, and other moist additions change water activity and food-safety requirements. Use a complete manufacturer or carefully developed formula, immediate start, and prompt cooling rather than improvising with the delay timer.
9. Use Dough-Only and Bake-Only Cycles Correctly
Dough or Pizza Dough
The Dough cycle mixes, kneads, and usually completes the first fermentation. It does not bake. At the end signal:
- Remove the dough promptly.
- Divide and shape it.
- Rest or proof it according to the bread style.
- Bake in a conventional oven.
This is the best route to pizza, dinner rolls, cinnamon rolls, braided loaves, and a conventional sandwich shape. The dough-cycle pizza and roll formula is sized for a common 1.5-pound machine.
Bake Only
Bake Only supplies heat; it does not replace mixing, kneading, or fermentation. Use it only when the manual and formula support it, such as extending an underbaked loaf by a documented amount or baking a prepared batter. Do not use it to “speed up” dough that has not risen.
10. Remove the Loaf Safely
The pan, handle, chamber, and loaf are hot at the end of baking.
- Put on dry oven mitts.
- Open the lid away from your face; hot vapor may escape.
- Unlock and lift the pan by its handle using the manual’s motion.
- Set it on a heat-resistant surface.
- Release the loaf by gently shaking or turning the pan as directed. Use only wood, silicone, or another nonmetal tool if an edge needs help.
- Check whether the paddle stayed in the pan or baked into the loaf. Use the supplied hook or a nonmetal tool after the loaf is safe to handle.
- Cool the loaf on a rack before slicing, usually at least 60 to 90 minutes for a sandwich loaf.
Leaving bread on Keep Warm for a long period can dry the crust, then create condensation as the loaf cools in the enclosed chamber. Prompt removal gives more predictable texture.
11. How to Clean a Bread Machine
Unplug the machine and let every part cool before cleaning. Never immerse the machine body, power cord, plug, heating chamber, or electrical assembly in water.
Clean the Pan
Follow the exact manual. A common safe pattern is:
- Remove loose crumbs with a soft cloth.
- Wash the pan interior with warm water, mild dish soap, and a soft sponge.
- Keep the exterior coupling and underside as dry as the manual requires.
- Dry immediately and completely before reinstalling.
Do not assume the pan is dishwasher-safe. Current major-brand manuals commonly call for hand washing. Dishwasher heat and detergent can damage nonstick coatings, handles, seals, and the drive assembly.
Never use steel wool, abrasive powder, a metal scraper, or a knife. If baked dough clings to the interior, let warm soapy water sit inside the pan for the brief period the manual permits. Do not submerge the pan or soak its exterior drive mechanism unless the manufacturer explicitly allows it.
Clean the Paddle and Shaft Opening
Remove the paddle after each loaf. Dough hidden in the bore can harden and make the next removal difficult.
Wash with mild soap and a soft brush. A narrow nylon brush can clean the center opening without scratching it. If the paddle is stuck on the shaft, do not pry against the pan coating. Put warm water inside the cooled pan as permitted, wait for residue to soften, then work the blade gently.
Collapsible paddles need extra attention around the hinge. Dried dough can keep the mechanism from folding or moving freely.
Clean the Machine Body and Chamber
Wipe the exterior with a barely damp cloth, then dry it. Once the chamber is cool, remove crumbs with a dry soft cloth or brush. Do not pour cleaner into the chamber, spray the heating element, or use a wet vacuum around an electrical appliance.
If liquid spilled beneath the pan, unplug the machine and follow the manual’s spill procedure. Do not power it on to “dry it out.” Contact manufacturer support if liquid entered the electrical base.
Clean the Dispenser and Lid Parts
Some dispensers are removable and washable; others are not. Follow the parts diagram. Dry a dispenser completely before reassembly so yeast, nuts, or dried fruit do not stick on the next cycle.
Gluten Cross-Contact
A bread machine is a hard appliance to decontaminate, and the reason is structural. Wheat residue collects in exactly the places a cloth cannot reach: the paddle bore, the shaft opening, the pan seal, the vents, the dispenser, and any scratch in the nonstick coating. Wiping out the chamber addresses the crumbs you can see and none of those. A dedicated machine is the only control that removes the question entirely.
What a Gluten Free button does is change the mixing and rise schedule to suit a batter-like formula. It is a cycle, not a sanitation system, and it has no idea what ran through the pan yesterday.
Before you buy or bake
- In a shared kitchen, controls are what make it safe
- Baking gluten-free alongside wheat is a question of controls rather than an automatic no: dedicated or thoroughly cleaned equipment, separate flour storage, cleaned surfaces, dedicated utensils, and no wheat flour being handled in the air around the gluten-free bake. Airborne flour settles for hours, and wooden, cast-iron, and worn plastic tools retain residue. The failure mode is assuming rather than verifying. Where those controls cannot genuinely be assured, a sealed product carrying the gluten-free claim is the safer choice.
12. Replacement Paddles, Pans, and Seals
Order parts by the complete model number and suffix. Similar-looking parts can have different shaft profiles, clearances, coatings, or lock geometry.
Replace the pan or paddle when:
- The coating peels, flakes, blisters, or exposes damaged substrate
- The paddle scrapes the pan
- The drive shaft leaks, wobbles severely, or binds
- The pan no longer locks securely
- The paddle bore is cracked or distorted
Current Cuisinart, Breville, and Zojirushi product pages list pans and/or paddles for many active models. Legacy support is less predictable. Price the part before buying a thrift-store machine; a complete current appliance can cost less than a rare discontinued pan.
Do not disassemble a sealed pan bearing, bypass a safety switch, or replace an internal power component unless the manufacturer provides a user-service procedure. Internal heating and motor repairs belong with qualified service.
13. Troubleshooting by Symptom
The Machine Will Not Start
Work through the outlet, plug, pan lock, lid state, and selected program. The most common non-obvious cause is heat: many machines refuse a new cycle while still warm from the last one and show a temperature error until they cool down. That is the appliance protecting itself, so let it cool and use the manual’s reset procedure rather than looking for a way around the sensor.
The Paddle Does Not Turn
Stop and unplug the machine. Check that the pan is fully locked and the paddle is installed. Remove any hard residue from the cooled shaft and coupling as the manual permits. If the motor runs but the coupling does not move, or if there is grinding, seek service rather than continuing under load.
Flour Remains in the Corners
The dough may be too dry, the blade may be missing, or the pan may not be engaged. During active kneading, a flexible spatula can nudge flour inward only if the manual permits lid opening and the tool stays clear of the moving blade. Correct a stiff formula with water in 5-gram increments.
The Loaf Is Dense
Verify yeast freshness, ingredient weights, and cycle selection. Whole-wheat dough on a short Rapid cycle often lacks the time or formula design it needs. A stiff dough also rises poorly. Change one cause at a time on the next loaf.
The Top Collapsed
Common causes are excess water, excess yeast, an overfilled pan, a warm room combined with a long programmed rise, or weak structure. The bread machine recipe troubleshooting section explains a controlled correction process.
Try It Yourself
The Crumb Lens
A machine loaf fails in the same ways an oven loaf does. Tap the problem zone on the cross-section to see whether the cause was fermentation, formula, or cutting too early.
Open ToolThe Center Is Gummy
The loaf may be too large, too wet, or sliced before cooling. Confirm formula capacity and allow starches to set on a rack. If the exact manual permits Bake Only to extend a loaf, follow its timing; do not repeatedly rebake without correcting the underlying formula.
The Crust Is Too Dark
Choose light crust for sweet or enriched dough. Sugar, milk, egg, fruit, and some whole grains brown faster. Also verify that loaf size was selected correctly.
The Loaf Will Not Release
Let the hot pan stand on a heat-resistant surface for the short period the manual recommends, then shake gently while wearing mitts. Do not run a metal knife around the coating. Once cool, inspect whether baked residue around the paddle shaft caused the sticking.
The Paddle Is Baked into the Loaf
This is normal on many machines. Check the pan before searching the loaf. Use the supplied removal hook or a nonmetal tool after the loaf is safe to handle. Never cut blindly with the paddle still inside.
An Error Code Appears
Write down the exact code and model number. Common categories include a machine that is too hot, a temperature-sensor fault, or an interrupted cycle, but codes are not standardized. Use only the exact manual’s definition.
14. Finding Manuals and Model Support
Start with the manufacturer, not a third-party manual archive. These current official resources were checked while preparing this guide:
- Cuisinart CBK-110NAS manual
- Cuisinart CBK-210NAS manual
- Breville BBM800 instruction manual
- Zojirushi BB-PPC20 manual
- Oster instruction-manual locator
Black+Decker is the cautionary case. Its appliance support pages no longer serve the B6000C use-and-care manual, so that model has already crossed into archive-only territory even though the machines are still in kitchens.
For a legacy machine, search the exact model in the manufacturer’s support or parts catalog first. When the manufacturer no longer hosts it, a scanned manual is still worth having — just check that the cover art and rating details match the appliance in front of you. A user-uploaded PDF is evidence about operation, never proof that replacement parts still exist or that the model retains any support.
When contacting support, provide:
- Full model and suffix
- Serial number if requested
- Purchase region and voltage
- Exact error code or symptom
- Photos of the data label, pan underside, paddle, and damaged part
That information is more useful than saying “my bread maker is not working.”
The Reliable Routine
Strip away the model-specific detail and the routine is short enough to memorize: right manual, right pan and paddle, weighed formula, right program, one honest look during the first knead, prompt removal, gentle cleaning once everything is cool. Seven steps, and only one of them requires judgment.
The bakers who get consistent loaves out of these machines are not the ones with the most recipes. They are the ones who wrote down the 5-gram correction their flour needed and used it every time after that. Once the basic loaf is calibrated, work outward into whole-wheat, cinnamon-raisin, fruit-and-nut, holiday, pumpkin, and dough-cycle recipes. And if the machine on your counter turns out to be missing its paddle or its parts support, the buyer guide’s legacy replacement table maps the common older models onto current ones.
Frequently Asked Questions
- Do wet or dry ingredients go into a bread machine first?
- Use the order in the exact model manual. Many current Cuisinart, Breville, and Zojirushi machines use liquids first, flour and dry ingredients next, and yeast last on top. Other machines reverse the order or use a dispenser, so there is no universal sequence.
- When should I check bread machine dough?
- Check after 5 to 10 minutes of active kneading, not during a programmed rest. Wheat dough should form one soft, slightly tacky mass that clears most of the pan. Correct cautiously with water or flour in 5-gram increments.
- Can I open a bread machine while it is running?
- During early kneading, yes — most machines expect you to lift the lid for a dough check, and that check is worth more than the small amount of heat you lose. Keep hands and tools clear of the moving paddle. During proofing and baking, keep it shut: that is when heat loss deflates a rising loaf or stalls a bake.
- Can I leave ingredients in a bread machine overnight?
- Only use delayed start with a formula the manufacturer permits. Do not leave eggs, liquid dairy, cheese, yogurt, fresh puree, vegetables, or other perishables in a warm pan for a long delay. Keep yeast dry and separated from liquid until mixing begins.
- Are bread machine pans dishwasher-safe?
- Do not assume they are. Current major-brand manuals commonly call for hand washing with mild soap and a soft sponge. Dishwasher heat and detergent can damage the coating, seals, handle, or underside drive assembly.
- How do I remove a stuck bread machine paddle?
- Let the pan cool. Put warm water inside the pan for the brief period the manual permits, keeping the exterior coupling dry, then work the paddle gently. Do not pry with metal or lever against the nonstick coating.
- What does the Dough cycle do?
- The Dough cycle mixes, kneads, and usually completes the first fermentation, then stops without baking. Remove the dough promptly, shape it, complete any final proof the bread needs, and bake in a conventional oven.
- Where can I find a bread machine manual?
- Read the full model number from the rating label and start with the manufacturer's support or product page. Match the regional suffix and voltage. Use a third-party archive only when the manufacturer no longer hosts the manual, and verify every identifying detail.