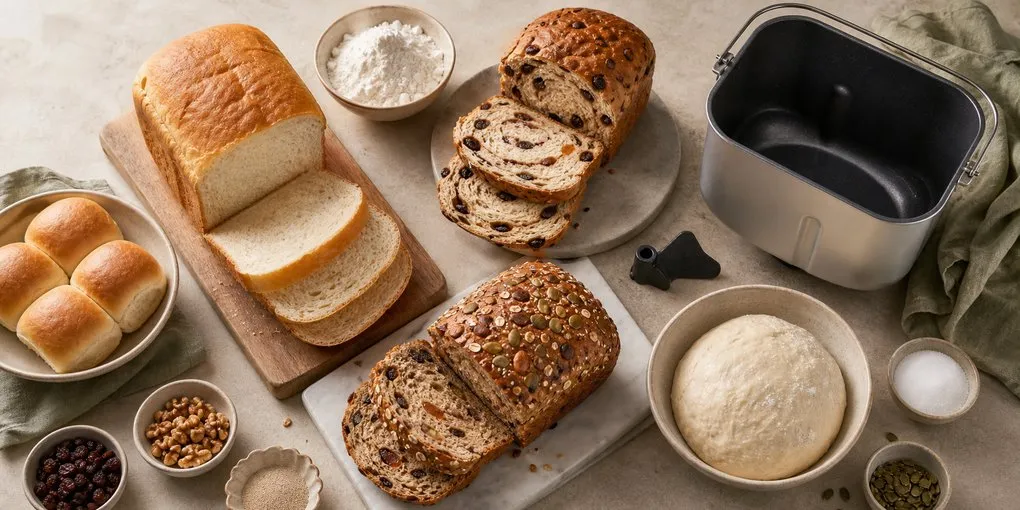
To adapt a recipe safely to a bread machine, start with the machine manual's maximum flour amount, weigh every ingredient, and keep the entire formula in the same proportion. Use the manual's ingredient order even when another recipe says otherwise. During the first 5-10 minutes of kneading, look for one soft, slightly tacky dough mass that clears most of the pan; correct with water or flour in 5-gram increments. Never scale beyond the pan's documented capacity, and do not use delayed start with eggs, liquid dairy, fresh puree, or other perishables.
Bread-machine recipes are not conventional recipes dropped into a metal bucket. The machine controls the kneading time, fermentation temperature, number of rises, and baking profile. A formula has to fit both the pan and the schedule.
The seven formulas below are original, gram-based recipes built from baker’s percentages in the JayArr Bread knowledge synthesis and cross-checked against current Cuisinart, Breville, and Zojirushi manual capacities. They are not presented as a physical bake test across every model. Machines differ enough that the early knead inspection remains part of every recipe.
If you are still choosing an appliance, start with our best bread machine comparison. If the controls, pan, or paddle are unfamiliar, read how to use a bread machine before loading it.
The Universal Bread Machine Formula
For a basic sandwich loaf, flour is 100%. Water starts near 60%, then sugar, fat, dry milk, salt, and yeast supply softness and reliable browning.
Do not read the machine’s loaf-size label as a promise about weight. “One pound,” “1.5 pound,” and “two pound” are program and pan classes that correspond roughly to a flour quantity, and a finished loaf usually weighs somewhat less than its label — a pan loaf sheds about a tenth of its mass as water during baking, so the 932-gram two-pound dough below comes out closer to 1.8 pounds. That is normal. Match the formula to the setting, not to the number on the box.
Basic Bread Machine Formula by Loaf Size
A complete sandwich-bread formula scaled to common machine settings
| Ingredient | 011-pound | 021.5-pound | 032-pound |
|---|---|---|---|
| Bread flour | 280 g | 400 g | 520 g |
| Water | 168 g | 240 g | 312 g |
| Dry milk | 11 g | 16 g | 21 g |
| Sugar | 17 g | 24 g | 31 g |
| Butter | 17 g | 24 g | 31 g |
| Fine salt | 5.5 g | 8 g | 10 g |
| Instant yeast | 3.5 g | 5 g | 6.5 g |
| Raw dough | about 502 g | about 717 g | about 932 g |
Use only a size your manual supports. A machine labeled 2-pound may impose a lower flour limit for whole-grain, sweet, or gluten-free programs.
jayarrbread.comThe baker’s percentages are 60% water, 6% sugar, 6% butter, 4% dry milk, 2% salt, and 1.25% instant yeast. Three of those numbers are doing deliberate work.
60% water puts this dough in the stiff, smooth, easy-to-handle band — the range every author on our reference shelf associates with sandwich loaves and bagels rather than artisan bread. That is the right target here, because a slack 75% dough has nothing to hold it up in a tall pan and no baker’s hands to fold it.
2% salt is the professional standard almost universally: Hamelman specifies 1.8–2%, Robertson and Reinhart use 2% flat, Forkish edges to 2.1–2.2%. Salt also slows fermentation and tightens gluten, which matters more in a machine than in a bowl, since nobody is watching to catch an over-proof.
1.25% instant yeast is high compared with artisan formulas, and intentionally so. Forkish’s overnight white gets its flavor from 0.08% yeast and 12 to 14 hours. A bread machine gives you a warm chamber and roughly an hour and a half of rise, so the yeast has to be dosed for the schedule you actually have. This is the trade the appliance makes: convenience bought with speed, and speed paid for in flavor development.
Treat all of it as a starting system rather than a law. Flour absorption shifts with brand, season, protein content, and whole-grain fraction — our guide to hydration in bread explains why one number can produce two different doughs.
How to Scale Without Overfilling
Scale every ingredient from flour weight, not from the finished loaf label. If a manual caps a program at 400 grams of flour, a 520-gram formula does not fit even if the machine is marketed as “up to two pounds” elsewhere.
Do not freely multiply yeast. A larger pan, warmer program, or longer rise can need less yeast than straight scaling suggests. Use the tested table above for the three common sizes, or scale a manufacturer formula written for your exact model.
Try It Yourself
The Baker's Bench
Adapting an oven recipe to your machine's flour ceiling? The Baker's Bench rescales every weight from flour and keeps the baker's percentages intact, so you can check the formula fits before you load the pan.
Open ToolIngredient Order: Your Manual Wins
Many current US Cuisinart, Breville, and Zojirushi manuals use the same broad sequence:
- Liquids and soft fats
- Flour and other dry ingredients
- Salt and sugar placed away from the center
- Yeast in a shallow well on top of the flour
That sequence is not universal. Some machines and programs specify dry ingredients first or use a yeast dispenser. Always follow the manual for the exact model number on the data label.
Ingredient separation matters most with delayed start. The yeast should remain dry and apart from salt and liquid until the machine begins. Use delay only with a formula the manual permits. Current manufacturer manuals warn against delaying recipes that contain eggs, liquid milk, cheese, yogurt, juice, vegetables, or other perishables. Dry milk is often used precisely because it can stay dry until mixing, but the model manual still controls.
Use cool or room-temperature ingredients unless the manual requests otherwise. Hot water can accelerate yeast before the programmed cycle is ready, while some machines deliberately include a rest or preheat stage.
1. Basic Sandwich Bread
Machine size: 1, 1.5, or 2 pounds using the scaling table above
Cycle: Basic or White
Crust: Medium
Typical total time: 3 to 4 hours
Ingredients
Use one complete column from the scaling table. Do not mix the two-pound flour amount with the 1.5-pound water amount.
Method
- Fit the paddle and lock the pan into place.
- Add ingredients in the manual’s required order.
- Select the matching loaf size, Basic or White cycle, and medium crust.
- Check after 5 to 10 minutes of active kneading. The dough should be soft, slightly tacky, and gathered around the paddle rather than smearing across the bottom.
- Add water or bread flour 5 grams at a time only if needed, waiting about a minute between additions.
- When the cycle ends, use oven mitts to remove the pan. Turn out the loaf and cool on a rack for at least 60 to 90 minutes before slicing. The crumb is still setting during that hour: cutting early compresses starch that has gelatinized but not yet firmed, which is what produces a gummy slice from an otherwise perfect bake.
For a softer hand-shaped version baked in a conventional pan, compare our sandwich bread recipe.
2. 50% Whole-Wheat Bread
Machine size: 1.5 pounds
Cycle: Whole Wheat
Crust: Medium
Typical total time: 3 hours 30 minutes to 4 hours 30 minutes
Ingredients
| Ingredient | Weight |
|---|---|
| Water | 275 g |
| Whole-wheat flour | 200 g |
| Bread flour | 200 g |
| Honey | 24 g |
| Neutral oil | 20 g |
| Nonfat dry milk, optional | 12 g |
| Fine salt | 8 g |
| Instant or bread-machine yeast | 5.5 g |
Method
- Add ingredients in the order required by your manual.
- Select the 1.5-pound Whole Wheat program and medium crust.
- Inspect during the first active knead. Whole-wheat dough should form a cohesive, soft ball but may look slightly rougher than white dough.
- If it is stiff enough to thump the machine or leaves dry flour in the corners, add water 5 grams at a time. If it pools beneath the paddle, add bread flour 5 grams at a time.
- Let the cycle finish. Remove promptly and cool completely before slicing.
The 50/50 flour split gives bran flavor without asking the machine to support a fully whole-grain loaf on the same water and timing. For 100% whole wheat, use a formula designed for that goal and read the whole-wheat bread guide first.
3. Cinnamon-Raisin Breakfast Bread
Machine size: 1.5 pounds
Cycle: Sweet, Fruit, or Basic; use the manual’s recommendation
Crust: Light
Typical total time: 3 to 4 hours
Add-ins: Raisins at the dispenser release or add-in signal
Ingredients
| Ingredient | Weight |
|---|---|
| Water | 245 g |
| Bread flour | 400 g |
| Sugar | 32 g |
| Unsalted butter | 28 g |
| Nonfat dry milk | 15 g |
| Fine salt | 7 g |
| Ground cinnamon | 3 g |
| Instant or bread-machine yeast | 5 g |
| Raisins | 90 g |
Method
- Separate any raisins stuck in clumps. If they are unusually dry and hard, rinse briefly and dry them thoroughly before loading the dispenser.
- Add everything except the raisins in the order required by the manual.
- Select a 1.5-pound Sweet, Fruit, or Basic program and light crust.
- Inspect the dough during early kneading and correct in 5-gram flour or water increments.
- Add raisins only at the machine’s add-in signal or through its dispenser. Adding them at the beginning can shred the fruit and interfere with gluten development.
- Remove the loaf promptly and cool before slicing.
Three grams of cinnamon flavors the dough without loading it so heavily that fermentation becomes unreliable. This is a cinnamon-raisin loaf, not a hand-rolled cinnamon swirl; use the Dough cycle and shape by hand if a defined spiral is the goal.
4. Cranberry-Walnut Fruit-and-Nut Bread
Machine size: 1.5 pounds
Cycle: Fruit/Nut, Sweet, or Basic
Crust: Light or medium
Typical total time: 3 to 4 hours
Add-ins: Cranberries and walnuts at the dispenser release or add-in signal
Ingredients
| Ingredient | Weight |
|---|---|
| Water | 260 g |
| Bread flour | 380 g |
| Whole-wheat flour | 40 g |
| Honey | 28 g |
| Neutral oil | 20 g |
| Fine salt | 8 g |
| Instant or bread-machine yeast | 5 g |
| Dried cranberries | 70 g |
| Chopped walnuts | 55 g |
| Finely grated orange zest, optional | 3 g |
Method
- Chop the walnuts into pieces small enough to distribute without jamming the dispenser. Keep the cranberries and walnuts separate from the base dough.
- Load water, flours, honey, oil, salt, yeast, and optional zest in the order specified by the manual.
- Select the 1.5-pound Fruit/Nut, Sweet, or Basic program.
- Check the dough during the first knead. Honey and flour absorption vary, so adjust with water or bread flour 5 grams at a time.
- Add the fruit and nuts at the signal. If the machine has no signal, use the timing chart in its manual rather than guessing from clock time.
- Remove promptly and cool completely.
The inclusions equal about 30% of flour weight. More can overload a small paddle, tear the developing dough, or create a loaf that crumbles around heavy clusters.
5. Holiday-Spice Cranberry-Pecan Bread
Machine size: 1.5 pounds
Cycle: Sweet
Crust: Light
Typical total time: 3 to 4 hours
Add-ins: Cranberries and pecans at the dispenser release or add-in signal
Delayed start: Do not use; this formula contains milk and egg
Ingredients
| Ingredient | Weight |
|---|---|
| Whole milk | 210 g |
| Large egg, without shell | 50 g |
| Bread flour | 420 g |
| Brown sugar | 40 g |
| Unsalted butter | 40 g |
| Fine salt | 7 g |
| Ground cinnamon | 2 g |
| Ground cardamom | 0.5 g |
| Ground nutmeg | 0.5 g |
| Instant or bread-machine yeast | 6 g |
| Dried cranberries | 65 g |
| Chopped pecans | 45 g |
Method
- Weigh the egg without its shell. Add milk, egg, flour, sugar, butter, salt, spices, and yeast in the machine’s required order.
- Select the 1.5-pound Sweet program and light crust. Do not use delayed start.
- Inspect the dough during the first knead. Enriched dough is softer than lean dough but should still gather into one mass.
- Add cranberries and pecans at the dispenser release or add-in signal.
- Let the full Sweet cycle finish. Remove with oven mitts and cool before slicing.
Milk, egg, sugar, and butter all promote a tender crumb and faster browning, which is why light crust is the safer first setting.
6. Pumpkin-Spice Yeast Bread
Machine size: 1.5 pounds
Cycle: Sweet or Basic
Crust: Light
Typical total time: 3 to 4 hours
Delayed start: Do not use; this formula contains fresh pumpkin puree
Ingredients
| Ingredient | Weight |
|---|---|
| Water | 115 g |
| Plain pumpkin puree | 180 g |
| Bread flour | 420 g |
| Brown sugar | 40 g |
| Unsalted butter | 25 g |
| Fine salt | 7 g |
| Ground cinnamon | 2.5 g |
| Ground ginger | 0.8 g |
| Ground nutmeg | 0.5 g |
| Ground cloves | 0.2 g |
| Instant or bread-machine yeast | 5.5 g |
Method
- Use plain pumpkin puree, not sweetened pie filling.
- Load all ingredients in the order required by the manual. Do not use delayed start.
- Select a 1.5-pound Sweet or Basic program and light crust.
- Inspect after 5 to 10 minutes of active kneading. Pumpkin brands vary in water content. The dough should be soft and cohesive, not pourable.
- If it smears like thick batter, add bread flour 5 grams at a time. If it remains crumbly, add water 5 grams at a time.
- Let the cycle finish, remove promptly, and cool completely.
This is a yeast bread flavored with pumpkin, not a cake-program quick bread. Do not switch to a Cake or Quick Bread program unless using a formula specifically leavened with baking powder or baking soda.
7. Dough-Cycle Pizza or Dinner-Roll Dough
Machine size: A machine rated for at least 1.5 pounds
Cycle: Pizza Dough or Dough
Crust: Not applicable
Typical machine time: 45 minutes on some pizza programs; 1 hour 20 minutes to 2 hours on full Dough programs
Yield: About 696 grams; two 12-inch pizzas or 12 dinner rolls
Ingredients
| Ingredient | Weight |
|---|---|
| Water | 240 g |
| Bread or all-purpose flour | 420 g |
| Olive oil | 15 g |
| Honey or sugar | 7 g |
| Fine salt | 9 g |
| Instant or bread-machine yeast | 5.5 g |
Method
- Load the ingredients in the manual’s required order.
- Select Pizza Dough if your machine has it; otherwise use the standard Dough program.
- Inspect during kneading. The dough should be smooth and slightly tacky, not wet enough to pool under the paddle.
- When the program ends, remove the dough. Do not leave it in a warm machine indefinitely after the final signal.
- For pizza, divide in two, cover, and rest 20 to 30 minutes before stretching. For more flavor, refrigerate the covered dough after the machine cycle and use the timing principles in our cold-fermentation guide.
- For rolls, divide into 12 pieces of about 58 grams, shape, place in a greased pan, cover, and proof until visibly expanded and slowly springing back when gently pressed. Bake in a conventional oven according to your chosen roll shape and pan.
The Dough cycle is where a bread machine becomes more than a square-loaf appliance. It handles mixing and first fermentation while you control final shape and oven heat.
Gluten-Free Adaptation Is Not a Flour Swap
None of the seven formulas above converts by swapping the bread flour gram-for-gram for a gluten-free blend. Every one of them is built around an extensible gluten network doing structural work — trapping gas, holding shape against a programmed rise. Take the gluten out and there is nothing left to do that job. Gluten-free bread solves the same problem with an entirely different system: a balance of starches and whole-grain flours, binders such as psyllium or other hydrocolloids, considerably more water, and usually a shorter single-rise schedule.
That is why the dough looks wrong when you check it. A gluten-free machine formula behaves like a thick batter, not a ball, and adding flour to make it “come together” is the most common way to ruin one. Use a complete formula developed for the specific blend and your machine’s capacity, select the dedicated Gluten Free program when it calls for one, and scrape dry corners only if your manual permits opening the lid mid-knead.
Recipe performance and safety are separate questions, and a formula that bakes beautifully settles only the first. Start with how gluten-free bread works, which breads are gluten-free, and whether sourdough is gluten-free.
Before you buy or bake
- Naturally gluten-free is not the same as gluten-free
- Rice, buckwheat, sorghum, teff, millet, and oats carry no gluten as crops, but they are routinely grown, stored, transported, and milled alongside wheat. The grain being naturally gluten-free is necessary and not sufficient — what matters is the finished bag. Buy flours that carry a gluten-free label, and note that several major brands decline to label some naturally gluten-free flours precisely because of supply-chain cross-contact.
- In a shared kitchen, controls are what make it safe
- Baking gluten-free alongside wheat is a question of controls rather than an automatic no: dedicated or thoroughly cleaned equipment, separate flour storage, cleaned surfaces, dedicated utensils, and no wheat flour being handled in the air around the gluten-free bake. Airborne flour settles for hours, and wooden, cast-iron, and worn plastic tools retain residue. The failure mode is assuming rather than verifying. Where those controls cannot genuinely be assured, a sealed product carrying the gluten-free claim is the safer choice.
Bread Machine Troubleshooting
The Top Collapsed
The dough produced more gas than its structure could hold. Common causes are too much water, too much yeast, an overfilled pan, a warm kitchen combined with a long rise, or a formula too weak for the programmed schedule. On the next loaf, change one variable. Start by checking that every weight was correct, then reduce water by 5 to 10 grams or yeast by about 10% if the dough looked excessively loose or rose into the lid.
The Loaf Is Dense and Short
Check yeast freshness, program choice, and dough consistency. A dry, tight ball cannot expand well; neither can a whole-grain formula run on a short rapid cycle. If the paddle turned but the dough stayed crumbly, add water in 5-gram increments during kneading. If the machine did not knead, confirm the pan and blade were fully seated before blaming the formula.
The Loaf Is Dry
Too much flour is the first suspect, especially when measuring by cups. A long keep-warm period also drives moisture from the crust and can create condensation later. Weigh flour, inspect the dough, remove the loaf promptly, and let it cool before bagging.
Flour Stayed in the Corners
The dough may be too dry, the pan may not be locked, or the paddle may be missing or installed incorrectly. During the permitted knead window, use a flexible spatula to nudge dry flour toward the dough while keeping hands and tools clear of the moving blade. Stop and unplug the machine before investigating a paddle that is not turning.
The Paddle Left a Large Hole
A paddle cavity is normal. Some manuals identify a safe pause before the final rise when the paddle can be removed; many do not. Never reach into a running machine or improvise timing around a moving shaft. If hole size is decisive, use the Dough cycle, shape by hand, and bake in a conventional pan.
Dough Reached the Lid
The formula exceeded the practical capacity or fermented too aggressively. Do not press hot or moving dough down by hand. Follow the manual’s stop and cool-down procedure, then reduce the batch. The correct long-term fix is a smaller formula, not repeated intervention during a powered cycle.
The Crust Is Too Dark
Sugar, milk, egg, and fruit all accelerate browning. Choose light crust for enriched and sweet formulas. If the sides are dark while the center remains underdone, do not simply shorten baking; first verify that the loaf size and cycle match the recipe.
A Better First Loaf
Start with the basic sandwich formula in the exact size your machine supports. Weigh it, watch the first knead, and write down any 5-gram correction. That note is more useful than collecting fifty random recipes because it calibrates the formula to your flour, climate, and machine.
Once the basic loaf is predictable, change one axis at a time: half whole wheat, then fruit and nuts, then a sweet enriched formula. For cycle-by-cycle setup and cleaning, keep the bread machine operating guide nearby.
Frequently Asked Questions
- Can I use a regular bread recipe in a bread machine?
- Sometimes, but do not pour it in unchanged. Confirm that the flour amount fits the machine, convert to grams, match the cycle to the dough, and inspect the first knead. Very wet artisan doughs, heavily enriched doughs, and recipes built around hand folds or cold fermentation often need a different machine formula or the Dough cycle.
- What order do ingredients go into a bread machine?
- Use the order in the exact model manual. Many current machines use liquids first, dry ingredients next, and yeast last in a well on top of the flour, but some reverse that sequence or use a yeast dispenser. The manual overrides a general recipe.
- How much flour fits in a 2-pound bread machine?
- There is no universal amount. The basic formula here uses 520 grams, but the machine manual's program-specific maximum is the hard limit. Whole-grain, sweet, cake, and gluten-free cycles may allow different quantities.
- When should I add raisins or nuts?
- Use the automatic dispenser or add them at the machine's add-in signal. Early addition can shred fruit, grind nuts, and interfere with gluten development. If there is no signal, use the model's cycle chart rather than guessing.
- Can I use delayed start with milk or eggs?
- Do not use delayed start with eggs, liquid milk, cheese, yogurt, fresh puree, or other perishables unless the manufacturer explicitly permits that exact formula. Current major-brand manuals warn against leaving perishable ingredients in the pan during a long delay.
- Why does my bread machine loaf collapse?
- A collapsed top usually means gas production exceeded dough strength. Check for too much water or yeast, an overfilled pan, a warm environment, or the wrong program. Verify weights first, then make one small change on the next loaf rather than changing everything.
- Can I make pizza dough in a bread machine?
- Yes. Use the Pizza Dough or Dough cycle to mix, knead, and complete the first fermentation, then divide, rest, shape, top, and bake in a conventional oven. The formula in this guide yields about 696 grams, enough for two 12-inch pizzas.