An arepa is a griddled corn cake made from just precooked corn flour (masarepa), warm water, and salt -- no leavening and no gluten. Venezuelans shape it thick (about 2cm) so it can be split and stuffed with fillings like reina pepiada; Colombians keep it thin (about 1cm) and grill it as a daily side. The two techniques that matter are the 5-minute hydration rest after mixing and reading the skillet heat -- medium heat so the interior cooks through before the crust burns.
Before you buy or bake
- Naturally gluten-free is not the same as gluten-free
- Rice, buckwheat, sorghum, teff, millet, and oats carry no gluten as crops, but they are routinely grown, stored, transported, and milled alongside wheat. The grain being naturally gluten-free is necessary and not sufficient — what matters is the finished bag. Buy flours that carry a gluten-free label, and note that several major brands decline to label some naturally gluten-free flours precisely because of supply-chain cross-contact.
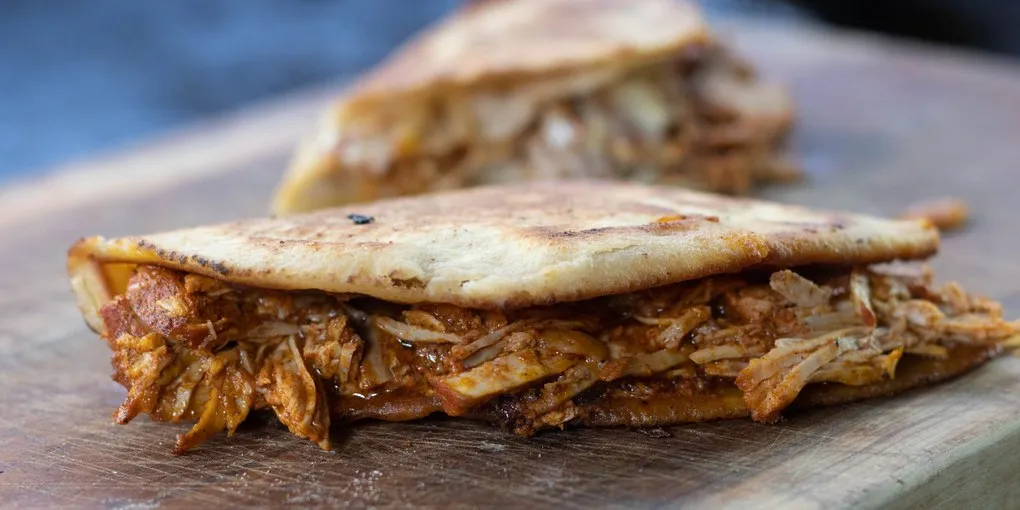
The arepa is one of the most misunderstood breads on the Latin American table. Americans who meet it for the first time in a Venezuelan restaurant encounter a fat, split corn pocket stuffed with shredded chicken and avocado and assume that is the whole category. An hour later, on a Colombian breakfast plate, they meet a flat corn disc the size of a saucer, lightly grilled, eaten as a side under a fried egg, and assume a totally different bread. Both are arepas. Both are correct. The differences trace the history of two countries that shared a bread tradition for thousands of years before separating it into mirror-image daily rituals.
This guide covers both — the thick, stuffable Venezuelan arepa reina pepiada style and the thin, griddled Colombian everyday arepa — using the same base dough of precooked corn flour, warm water, and salt. Four ingredients, no leavening, no gluten. The only technique that matters is the resting hydration step and reading the skillet heat. Once you have those two, every regional variation is a matter of shape.
Because arepas are corn-based and naturally gluten-free, they are one of the friendliest breads in this series for anyone avoiding wheat. If you cook for someone with celiac disease, check that your corn flour is certified gluten-free and handled without cross-contact — the dough itself contains no gluten, but shared equipment and facilities can introduce it.
Cultural Context
Archaeological evidence from the Parque Nacional Cueva del Guácharo region of Venezuela and the Magdalena River valley in Colombia places corn cultivation and ground-maize cakes in the region around 3,000 years before European contact. The Timoto-Cuica peoples of the Venezuelan Andes and the Chibcha (Muisca) of the Colombian highlands both prepared flat maize cakes on heated stones — the direct ancestors of today’s arepa. The word arepa itself derives from erepa, the Cumanagoto (Caribbean Venezuelan) word for corn cake.
For most of the twentieth century, making arepas at home was a half-day project. Dried corn kernels had to be soaked, cooked with ash or lime in a process called nixtamalization to release niacin and soften the hull, then ground on a stone metate into fresh dough. The finished arepa was delicious but completely impractical for a modern weekday breakfast.
The revolution came in 1960. Venezuelan engineer Luis Caballero Mejías patented a process for industrially precooking and drying nixtamalized corn — the result was a shelf-stable flour that rehydrated into workable arepa dough in five minutes. His employer, Empresas Polar, launched it under the brand name Harina P.A.N. (Producto Alimenticio Nacional), and within a decade every Venezuelan household had a bag of yellow bagged corn flour in the cupboard. Colombia developed a parallel industry under brand names like Goya and Areparina, and the arepa moved from a Sunday-morning project to a twenty-minute daily staple.
The two countries then diverged on what to do with the dough. Venezuelans kept the arepa thick — about 2 cm (three-quarters of an inch) — so it could be split like a pita and stuffed with fillings. The canonical Venezuelan arepa is the reina pepiada (“curvy queen”), invented in Caracas in 1955 to honor Miss World Susana Duijm, a shredded chicken, avocado, and mayonnaise filling that became the signature Venezuelan street food. Colombians kept the arepa thin and ungarnished — 1 cm or less (less than half an inch) — and served it as an edible plate or side dish, cooked on a flat budare griddle and often grilled over charcoal until the surface blackens in spots. Both traditions are delicious; they simply answer different questions about what a bread is for.
Venezuelan vs Colombian Arepas
Same dough, two national traditions
1. Hydrate the Dough
- Flour
- 500g precooked corn flour (P.A.N.)
- Water
- 650g at 100-110F
- Rest
- 5 minutes covered
- Whisk flour + salt, pour in warm water.
- Knead 1-2 min to smooth.
- The 5-min rest is where hydration completes.
2. Venezuelan-Style
- Portion
- 140g each
- Thickness
- 2 cm (thick)
- Width
- 10 cm across
- Thick disc, smooth the edges.
- Designed to be split and stuffed.
- Typical fill: reina pepiada (chicken + avocado + mayo).
3. Colombian-Style
- Portion
- 90g each
- Thickness
- 1 cm (thin)
- Width
- 11-12 cm across
- Thin disc, often grilled over flame at finish.
- Eaten under a fried egg or with butter + cheese.
- Use a flat glass or tortilla press for even thinness.
4. Griddle Cook
- Venezuelan
- 6-8 min/side
- Colombian
- 3-4 min/side
- Heat
- Medium (dry skillet)
- Hollow-sounding when tapped = done (Venezuelan).
- Golden + char spots = done (Colombian).
- Finish Colombian-style over open flame for blister.
Precooked corn flour (masarepa) is not the same as masa harina. Don't substitute -- the textures diverge completely.
jayarrbread.comIngredients
Base dough — makes 8 Venezuelan-style (thick) or 10-12 Colombian-style (thin) arepas.
| Ingredient | Grams | US Measure | Baker’s % |
|---|---|---|---|
| Precooked white or yellow corn flour (masarepa) | 500 g | about 4 cups | 100% |
| Fine sea salt | 8 g | 1½ tsp | 1.6% |
| Warm water (100-110°F / 38-43°C) | 650 g | 2¾ cups | 130% |
| Neutral oil (optional, for richness) | 15 g | 1 Tbsp | 3% |
Flour note: This recipe requires precooked corn flour (masarepa) — the most common brand is P.A.N. (blue or yellow bag). Do not substitute masa harina (the Mexican tortilla/tamale flour), regular cornmeal, or polenta. Masa harina is nixtamalized but ground differently and produces a gummy arepa; cornmeal and polenta are not precooked and will remain gritty. Look for bags labeled harina de maíz precocida or precooked corn meal. White corn flour (harina blanca) is traditional in Venezuela; yellow (harina amarilla) is more common in Colombia and has a slightly sweeter, more yellow-hued crumb.
Water temperature: Warm water (not hot, not cold). Hot water can partially cook the surface of the flour and produce a gummy texture; cold water hydrates slowly and leaves dry pockets.
Oil note: Optional. Many Venezuelan home cooks add a tablespoon for a richer, slightly more pliable dough. Purists leave it out.
For reina pepiada filling (Venezuelan-style)
| Ingredient | Grams / Amount |
|---|---|
| Cooked, shredded chicken breast | 400 g (about 3 cups) |
| Ripe avocado, mashed | 200 g (1 large) |
| Mayonnaise | 60 g (4 Tbsp) |
| Lime juice | 15 g (1 Tbsp) |
| Finely minced red onion | 30 g (2 Tbsp) |
| Salt, pepper, chopped cilantro | To taste |
Method
Step 1 — Hydrate the dough (5 minutes active, 5 minutes rest)
In a large bowl, whisk the corn flour and salt together. Pour in the warm water and the oil (if using), stirring with a wooden spoon until a soft, shaggy dough forms. Switch to your hands and knead briefly in the bowl — just 1 to 2 minutes — until smooth and uniform.
Cover the bowl with a damp towel and let the dough rest for 5 minutes. This rest is critical: the precooked flour continues absorbing water during this window, and a dough that feels slightly wet right after mixing will feel exactly right after 5 minutes.
Step 2 — Check consistency and adjust
After the rest, the dough should feel like soft modeling clay or a firm mashed potato. Pinch off a small piece and roll it into a ball — if the surface cracks or feels dry, add water 15 g at a time, kneading in between. If it feels sticky on your hands, add flour 10 g at a time. Target feel: smooth, holds its shape, slightly tacky but not sticky.
Step 3 — Shape
For Venezuelan-style (thick, stuffable): Divide the dough into 8 equal pieces, about 140 g each. Roll each piece into a ball between your palms, then flatten into a disc approximately 10 cm (4 inches) wide and 2 cm (three-quarters of an inch) thick. Smooth any surface cracks with wet fingertips — cracked edges will burn in the skillet.
For Colombian-style (thin, flat): Divide the dough into 10 to 12 pieces, about 90 g each. Flatten each into a disc 11 to 12 cm (4½ inches) wide and 1 cm (less than half an inch) thick. A flat-bottomed glass or a tortilla press between two sheets of plastic works well for uniform thinness.
Step 4 — Griddle cook
Heat a heavy dry skillet, budare, or cast-iron pan over medium heat. Do not use high heat — the arepa needs to cook through to the center without the outside burning.
Venezuelan-style: Cook 6 to 8 minutes per side, flipping once, until both sides have a golden-brown crust and the arepa feels hollow when tapped. The interior must cook through completely before you split it. Total cook time: 12 to 16 minutes.
Colombian-style: Cook 3 to 4 minutes per side, flipping once, until both surfaces are golden with charred spots. Because they are thinner, they cook faster and benefit from slightly higher heat for good surface color.
For the classic Colombian finish, move the cooked arepas to a charcoal grill or open flame for 30 to 60 seconds per side at the very end — this is where the smoky, blistered crust comes from.
Step 5 — Finish and serve
Venezuelan-style: Let the cooked arepa rest 2 minutes, then split along the equator with a serrated knife, leaving a hinge on one side. Stuff with reina pepiada filling (or black beans and queso fresco, or any combination). Eat immediately.
Colombian-style: Serve immediately, often under a fried egg (arepa con huevo), spread with butter and cheese (arepa con queso), or alongside a hot breakfast plate with beans and chorizo.
Reina Pepiada Filling — Method
Combine the shredded chicken, mashed avocado, mayonnaise, lime juice, and red onion in a bowl. Season with salt, pepper, and chopped cilantro to taste. Mix until cohesive but still chunky — this is a salad, not a purée. Stuff warm arepas within 30 minutes; the avocado oxidizes after that.
Troubleshooting
Arepa cracks around the edges when shaping: Dough too dry. Add water 15 g at a time. Smooth existing cracks with wet fingertips before griddling — unsealed cracks burn.
Arepa gummy or raw in the center (Venezuelan-style): Cooked at too-high heat or too thin. Reduce heat to medium, extend cook time to 7-8 minutes per side, and verify the 2 cm thickness.
Arepa tough or dry after cooking: Overcooked, or flour was measured too heavy. Cook just until hollow-sounding when tapped, and use weight measurements, not cups.
Arepa falls apart when splitting: Underhydrated dough, or the rest step was skipped. The 5-minute hydration rest after mixing is non-negotiable.
Surface pale, no char: Skillet not hot enough. Medium heat for Venezuelan-style, medium-high for Colombian-style. A correctly heated pan should have a water droplet skate across in 2-3 seconds.
Arepas dense instead of pillowy: This is normal. Arepas are a dense corn bread, not a fluffy yeasted bread. If density bothers you, reduce thickness or try the Colombian-style instead.
Storage
Cooked arepas keep in a zip-top bag at room temperature for 1 day, refrigerated for 4 days, or frozen for 2 months. Reheat on a dry skillet for 2 minutes per side or in a 350°F oven for 8 minutes. Do not microwave — it produces a gummy texture.
Arepas sit alongside flour tortillas and other corn and wheat flatbreads in the Latin American bread canon. For another corn-based tradition, see our Southern cornbread. For flatbread traditions from other continents, see our roti and chapati and paratha recipes, or the pillowy naan bread baked at home.
Frequently Asked Questions
- What is the difference between arepa flour and masa harina?
- They are both precooked corn flours, but the processing differs enough that they are not interchangeable. Masa harina (the Mexican staple used for corn tortillas and tamales) is nixtamalized -- soaked and cooked with slaked lime to release niacin and soften the hull -- and ground fine. Arepa flour (masarepa) is also precooked, but through a different steaming-and-drying process without lime, and ground to a slightly coarser texture suited to the thicker arepa dough. Substituting masa harina in an arepa recipe produces a gummy, dense result with a distinctively nixtamal flavor that reads as 'wrong' to anyone familiar with the real thing. P.A.N., Goya, and Areparina are the most common masarepa brands in North American grocery stores.
- Are arepas gluten-free?
- Yes, genuinely -- a traditional arepa contains only corn flour, water, and salt. Because precooked corn flour is often processed in dedicated corn-only facilities (P.A.N. certifies this), cross-contamination can be minimal. This makes arepas one of the friendlier scratch breads for people avoiding gluten. Always verify the package label if you are cooking for someone with celiac disease; cross-contact handling varies by producer, and shared kitchen equipment can still introduce gluten.
- Why are my arepas cracking around the edges?
- Dough is under-hydrated. Precooked corn flour varies in age, humidity absorption, and brand consistency, and 130% hydration is a starting point, not a rule. After the 5-minute rest, pinch off a piece and roll it into a ball between your palms -- if the surface cracks or feels dry, the dough needs more water. Add 15 g at a time until the ball rolls smooth. Cracks that are already in the shaped arepa should be smoothed with wet fingertips before it hits the skillet -- unsealed cracks burn and break further during cooking.
- Venezuelan or Colombian -- which is the 'real' arepa?
- Both are real, and both have roots at least a thousand years older than either modern nation-state. The Venezuelan thick-and-stuffed style and the Colombian thin-and-grilled style represent two answers to the same bread. Venezuelans prize the arepa as a pocket for fillings like reina pepiada (chicken, avocado, mayo) or pelúa (shredded beef and cheese). Colombians prize it as a daily griddle bread, often eaten with butter and cheese or under a fried egg for breakfast. Don't let anyone tell you one is more authentic. Make both.
- Can I make arepas ahead and reheat them?
- Yes, with some caveats. Cooked arepas keep at room temperature for a day, refrigerated for 4 days, and frozen for up to 2 months (wrapped individually or separated with parchment). Reheat on a dry skillet over medium heat for 2 minutes per side, or in a 350F oven for 8 minutes. Avoid the microwave -- it produces a gummy, rubbery texture by driving moisture to the surface. If you plan to stuff the arepas, reheat them whole and split them after heating; splitting first lets them dry out.